Standardized medical photography is essential because it turns visual treatment documentation into reliable clinical evidence. Consistent lighting, positioning, camera settings, focus, and patient preparation allow clinicians to compare skin texture, pigmentation, wrinkles, scars, hair density, and lesion size before and after laser treatment. It supports treatment selection, progress monitoring, outcome evaluation, patient communication, medical records, and medicolegal documentation.
The value of a clinical photograph depends on its consistency. When the camera, lighting, angle, distance, background, and patient preparation remain the same, visible changes are more likely to represent genuine treatment outcomes rather than photographic variation.
Why Standardization Matters in Laser Treatment Documentation
It Makes Before-and-After Comparisons More Reliable
Laser outcomes are often subtle. Changes in pigmentation, fine lines, skin texture, vascular lesions, scars, or hair density can be obscured by differences in exposure, shadows, camera distance, or facial expression.
A standardized protocol controls these variables. This gives clinicians a more dependable visual basis for determining whether a treatment has produced meaningful improvement.
It Creates a Longitudinal Clinical Record
Many aesthetic laser treatments require multiple sessions and months of follow-up. Consistent photographs establish a baseline and allow clinicians to track progress across the entire treatment course.
Images can help identify lesion clearance, gradual scar maturation, changes in hair density, and post-procedural complications that may be difficult to assess from memory alone.
It Supports Treatment Planning and Modality Selection
Documented baseline findings help clinicians select and adjust treatment parameters and modalities. Photographs can support decisions involving resurfacing, pigment treatment, vascular treatment, hair removal, and other energy-based procedures.
They also provide a visual record for preoperative planning and for comparing the response of different anatomical areas or treatment approaches.
It Improves Patient Communication
Patients may not remember their original appearance accurately, particularly when improvements occur gradually. Consistent photographs allow clinicians to show realistic changes over time without relying solely on subjective impressions.
This can improve understanding of the treatment process and help align expectations with achievable outcomes.
It Strengthens Medical and Legal Documentation
High-quality, reproducible images form part of the patient’s clinical record. They can document baseline findings, treatment response, adverse events, and the condition of a treated area at specific points in time.
When integrated into an Electronic Medical Record, standardized photographs also provide an accessible chronology of care. They should complement, rather than replace, written clinical notes and informed-consent documentation.
What Makes a Medical Photograph Standardized?
Control the Lighting and Exposure
Use the same ambient lighting, flash, exposure, and camera settings for each session. A ring flash or comparable professional flash system can provide consistent, relatively shadowless illumination across visits.
The flash should be positioned and controlled carefully. Excessive light or an unsuitable shooting distance can overexpose the image and erase important skin-texture details.
Keep Positioning and Angles Consistent
Use the same camera height, distance, focal length, patient perspective, and anatomical views for pre-treatment and follow-up images. The patient should maintain a neutral expression, look forward, and keep the head and neck in a natural position.
Small changes in posture can alter the apparent volume, contour, or tension of facial and body tissues. A positioning guide, marked floor location, or fixed camera setup can reduce this variation.
Prepare the Patient and Background Consistently
Use a clean, neutral background such as black, blue, grey, or white. Remove makeup, jewelry, and distracting accessories, and tie back or cover the hair when necessary.
The goal is to make the treated area the primary subject while preventing background details or cosmetic products from influencing the assessment.
Use Appropriate Focus and Depth of Field
A relatively small aperture, such as f/11 to f/22, can provide sufficient depth of field to keep facial or body contours in focus. The exact setting depends on the camera, lens, lighting, and required image quality.
A shutter speed faster than 1/60 second, such as 1/125 second, helps reduce motion blur from minor patient movement or camera shake.
Avoid Perspective Distortion
A standard focal length is generally preferable for facial documentation. For a full-frame camera, a lens around 50 mm can help avoid the exaggerated proportions associated with wide-angle lenses.
The camera should be positioned far enough away to frame the patient without excessive perspective distortion. The same focal length should be used for comparable images.
Photograph Localized Areas Precisely
For a lesion or small treatment area, use a macro lens or the camera’s macro capability. Maintain the same magnification and angle at each visit.
Include a measuring tape beside a recognizable anatomical landmark when lesion size or treatment-area dimensions matter. This adds an objective size reference to the visual record.
Equipment Options for Aesthetic Laser Clinics
Compact Digital Cameras
Compact cameras are cost-effective, portable, and straightforward to operate. They may be appropriate for clinics that need a simple point-and-shoot system with minimal training and a small equipment footprint.
Their limitations include non-interchangeable lenses, less control over focal length and perspective, and possible shutter lag. Automatic exposure and color processing may also make it harder to reproduce identical settings across visits.
DSLR Cameras
DSLR cameras offer interchangeable lenses, higher levels of manual control, and greater flexibility in managing aperture, shutter speed, exposure, and color consistency. They can be paired with standard focal-length lenses, macro lenses, and dedicated flash systems.
A DSLR’s optical viewfinder uses a mirror and prism to show the scene through the lens, while the image sensor records the final photograph. This provides a direct optical framing method, although the viewfinder image is not itself a guarantee that exposure or color will match the recorded file.
DSLR systems are larger, more complex, and more expensive than compact cameras. They require appropriate lenses, lighting, storage, maintenance, and staff training.
Lens Selection
A standard lens is useful for reproducible full-face or body views. Macro lenses are better suited to localized lesions, scars, pigmentation, texture, and other small treatment areas.
Whatever lens is selected, the clinic should fix the focal length and maintain a consistent camera-to-patient distance for comparable images.
Ring Flash or Consistent Flash System
A ring flash can provide uniform illumination around the lens and reduce uneven shadows. This is particularly useful when documenting skin texture and color under repeatable conditions.
Flash should be used as part of a controlled setup rather than as an automatic substitute for protocol. Its power, distance, and position must remain consistent.
Supporting Equipment
A standardized setup may also include a tripod, fixed camera position, neutral backdrop, positioning markers, hair caps, measurement tools, and controlled storage within the EMR.
These accessories are often as important as the camera itself. A high-end camera cannot compensate for changing patient positions, inconsistent lighting, or different shooting distances.
Understanding the Trade-offs
Image Quality Versus Operational Simplicity
Compact cameras reduce cost and training requirements, but they provide fewer options for controlling perspective, depth of field, and exposure. DSLRs provide more consistent control but demand a more disciplined workflow.
The best choice is the system the clinic can operate consistently. A sophisticated camera used inconsistently produces weaker documentation than a simpler system used according to a reliable protocol.
Automation Versus Reproducibility
Automatic camera modes are convenient, but they may change exposure, white balance, flash output, or image processing between visits. These changes can make skin appear lighter, darker, warmer, or cooler without any clinical change.
Manual settings improve reproducibility when staff are trained to use them correctly. Presets can help reduce variation between operators.
Detail Versus Patient Privacy
High-resolution images support clinical assessment, but they also contain sensitive personal health information. Access controls, secure storage, appropriate file naming, and EMR integration are necessary to protect patient privacy.
Images should be captured and retained according to applicable privacy, consent, and record-retention requirements.
Consistency Versus Clinical Flexibility
A fixed protocol is essential for comparison, but some cases require additional views or close-ups. Supplemental images can be added when clinically useful, provided they are clearly identified and do not replace the standardized views.
Clinicians should distinguish protocol images from exploratory or diagnostic photographs in the medical record.
Documentation Versus Marketing Use
Clinical photographs may help demonstrate treatment outcomes, but images used for marketing require appropriate patient authorization and should not be presented in a way that overstates typical results.
The clinical record should remain complete and objective even when selected images are later used for educational or promotional purposes.
How to Apply This to Your Project
A practical approach is to define the protocol first, then select equipment that can support it consistently.
- If your primary focus is affordability and portability: Choose a compact digital camera, but establish fixed views, distance, lighting, and preparation procedures to reduce its automation-related limitations.
- If your primary focus is maximum control and image consistency: Choose a DSLR with a standard lens, manual exposure controls, and a consistent flash system.
- If your primary focus is documenting small lesions or scars: Add a macro lens or macro-capable setup and include a measuring reference beside a recognizable anatomical landmark.
- If your primary focus is repeatable facial photography: Use a fixed camera position, standard focal length, neutral background, controlled flash, and consistent head positioning.
- If your primary focus is longitudinal clinical records: Integrate standardized images into the EMR and link each photograph to the treatment date, anatomical site, and relevant clinical notes.
- If your primary focus is patient communication: Use matched baseline and follow-up images to demonstrate realistic progress while preserving objective documentation standards.
Standardized photography gives aesthetic laser clinics the visual evidence needed to evaluate outcomes accurately, communicate responsibly, and make better-informed clinical decisions.
Summary Table:
| Equipment | Key Features | Best For |
|---|---|---|
| Compact Digital Cameras | Portable, cost-effective, simple operation | Clinics needing basic documentation with minimal training |
| DSLR Cameras | Interchangeable lenses, manual controls, higher consistency | Clinics prioritizing image quality and reproducibility |
| Macro Lenses | High detail for close-ups, precise magnification | Documenting small lesions, scars, or pigmentation |
| Ring Flash | Uniform illumination, reduces shadows | Consistent skin texture and color documentation |
| Supporting Accessories | Tripod, neutral backdrop, positioning markers, measuring tools | Standardizing patient positioning and background |
Elevate your aesthetic practice with precise documentation. BELIS offers professional-grade laser and aesthetic devices trusted by clinics and premium salons. Contact our experts today to discover how our advanced technology can enhance your treatment outcomes. Contact us for a free consultation tailored to your clinic's needs.
Related Products
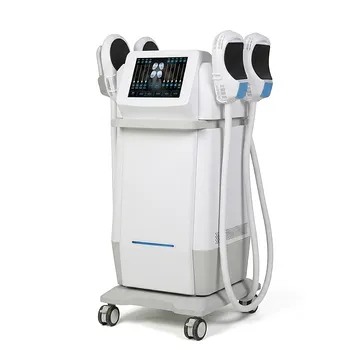
- EMSlim Neo Nova Body Sculpting EMS Sculpting Machine
- Skin Tester Analysis Machine Analyser for Skin Testing
- Cryolipolysis Fat Freezing Machine and Ultrasonic Cavitation Device
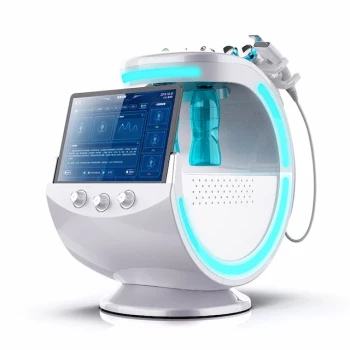
- Hydrofacial Machine with Facial Skin Analyzer and Skin Tester
- 22D HIFU Machine Device Facial Machine
People Also Ask
- How do RF body sculpting devices target subcutaneous fat & tighten skin?
- What is the biological mechanism of action by which radiofrequency (RF) energy achieves body sculpting and cellulite reduction? Discover how controlled heating remodels collagen, influences fat, and smooths skin.
- What anatomical mechanisms cause lower face and submental contour loss, and how do body sculpting and RF technologies address jowls and neck laxity? Discover the key causes and non-surgical solutions.
- How can aesthetic practitioners accurately differentiate between muscular hypertrophy and subcutaneous fat accumulation when evaluating patients for calf or lower face contouring using body sculpting equipment?
- How does radiofrequency (RF) operating frequency influence tissue selectivity and therapeutic outcomes in non-invasive RF body sculpting systems?