For precise tissue ablation, clinicians should use controlled, uniform passes with validated fluence, spot size, repetition rate, and overlap settings. A typical superficial resurfacing approach uses 2 to 3 passes with a 3–5 mm spot, 1–2 J pulse energy, approximately 5.1–10.2 J/cm² fluence, 5–10 Hz repetition rate, and 10–30% overlap. Between passes, remove tissue debris with dry or moistened gauze so the treatment plane remains visible and subsequent pulses are delivered evenly.
The central principle is controlled cumulative ablation: match total tissue removal to the clinical target, keep the handpiece moving, avoid pulse stacking, and reassess the tissue plane between passes.
How Er:YAG Ablation Enables Precision
Water-selective tissue interaction
Er:YAG systems operate near 2.94 µm, where water in biological tissue absorbs energy very strongly. This produces rapid vaporization of superficial tissue with relatively limited residual thermal injury compared with more thermally conductive ablative approaches.
The resulting precision depends on the actual device, pulse duration, fluence, spot geometry, and tissue hydration. Published depth estimates should therefore be treated as planning guides rather than guaranteed measurements for every system.
Fluence determines ablation depth
The treatment team should select fluence according to the desired tissue depth, anatomical site, lesion type, and patient factors. The reference ranges describe approximately 5 J/cm² for superficial ablation, with higher settings used for deeper treatment only when clinically justified and supported by the device protocol.
A practical planning concept is that each pass removes a defined layer. The cumulative depth depends on both fluence and the number of passes, so clinicians should avoid assuming that pass count alone predicts the final depth.
Establishing a Uniform Treatment Field
Prepare and define the treatment zone
Before firing, clinicians should confirm the treatment boundaries, identify anatomical transitions, and establish a consistent handpiece distance and orientation. The skin should be prepared according to the applicable clinical and device protocol, with adequate analgesia and protection of structures that must not receive laser energy.
Parameters should be adjusted for regional differences in skin thickness and sensitivity. Areas such as the nose, forehead, and perioral region may require different settings or treatment intensity than broader areas such as the cheeks.
Use a systematic sweeping motion
The handpiece should be moved in a controlled sweep at a speed compatible with the selected repetition rate. A structured grid, such as lateral-to-medial followed by superior-to-inferior coverage, helps the operator maintain consistent coverage and avoid untreated islands.
The operator should keep the handpiece moving whenever the system and protocol require motion during firing. Computerized motion-scanning handpieces can further reduce localized over-treatment by limiting firing when the handpiece stops.
Change the direction between passes
Subsequent passes should be oriented perpendicular or diagonally to the preceding pass. Cross-hatching distributes treatment more evenly and reduces the likelihood that linear movement patterns will create areas of excessive or insufficient ablation.
The operator should maintain the planned overlap consistently. Excessive overlap can deepen selected areas disproportionately and increase thermal accumulation.
Selecting Passes for the Clinical Objective
Epidermal vaporization
For uniform epidermal vaporization, the primary reference supports 2 to 3 passes with a 3–5 mm spot, 1–2 J pulse energy, 5–10 Hz repetition rate, and 10–30% overlap. The operator should inspect the field after each pass rather than automatically completing a predetermined number.
Alternative protocols may use approximately 5–7 J/cm² over 2–4 passes or 8–15 J/cm² over 1–2 passes, depending on the system and treatment objective. These ranges are not interchangeable without accounting for spot size, pulse duration, scanner behavior, and the device’s calibrated output.
Dermal resurfacing
For deeper wrinkles or textural irregularities, additional uniform passes may be used to remove approximately 15–30 µm per pass, provided the intended depth remains within the clinician’s treatment plan and the device’s validated operating range.
Depth should be assessed cumulatively. A superficial pass count described in one protocol should not be directly transferred to another system without confirming how that system converts fluence into ablation depth.
Scar and margin treatment
A full-coverage resurfacing sequence can be followed by targeted treatment of individual scar shoulders or raised margins. The goal is to soften the transition between the abnormal contour and surrounding skin while preserving the surrounding tissue.
For boxcar or other sharply defined scars, a smaller spot or higher fluence may be considered for targeted sculpting. More aggressive combinations, including use of another ablative modality, require a separate risk assessment and should follow an established clinical protocol.
Tissue sculpting with a focused handpiece
Raised lesions or tissue peaks can be selectively reduced with a focused 1–2 mm handpiece. Holding the handpiece at an acute angle allows the operator to ablate the peak progressively rather than removing tissue straight down.
The operator should use short, deliberate applications and repeatedly inspect the contour. The objective is to flatten the prominence without creating a trough, crater, or perforating hole.
Blend the treatment margins
The transition between treated and untreated skin can be softened by reducing fluence or defocusing the handpiece or scanner beam at the margins. Margin blending should be gradual and controlled so that the boundary does not become a visible step.
The blending method must remain compatible with the device’s optical geometry and manufacturer instructions. Defocusing should never be used as a substitute for understanding how the system delivers energy outside its focal plane.
Debris Removal and Inter-Pass Assessment
Wipe between passes
Fine ablated debris can obscure the tissue plane and interfere with accurate visual assessment. A quick wipe with dry or moistened gauze between passes restores direct visualization and helps maintain consistent energy delivery.
Moistened gauze can also rehydrate the surface, but wiping should be brief and gentle. Excessive manipulation can irritate treated tissue or alter the surface condition in a way that makes subsequent passes less predictable.
Reassess before continuing
After each pass, clinicians should assess the treatment field for uniformity, the intended endpoint, and areas that appear over-treated or under-treated. Further passes should be limited to what is necessary to achieve the planned endpoint.
A fixed number of passes should not override visible tissue response, anatomical variation, or patient safety considerations. The procedure should stop when the intended clinical endpoint has been reached.
Safety Controls During Ablative Resurfacing
Protect eyes correctly
The patient, operator, and room personnel must use wavelength-appropriate laser eye protection throughout the procedure. Eyewear must be rated for the Er:YAG wavelength and suitable for the system’s output.
For periocular treatment, standard eyewear may not provide sufficient protection. The clinician should use the appropriate ocular shields and procedural precautions specified by the device manufacturer and institutional laser-safety program.
Control plume and debris
Ablative resurfacing creates smoke and vaporized tissue that may present inhalation and biological hazards. Use dedicated plume evacuation positioned close to the treatment site, together with appropriate respiratory protection and room ventilation procedures.
The clinical team should follow applicable infection-control, laser-safety, and occupational-health requirements. Plume control is part of the treatment protocol, not an optional finishing step.
Avoid pulse stacking
Pulse stacking occurs when multiple pulses accumulate in one location before the tissue has been adequately cleared or the handpiece has moved. It can produce disproportionately deep ablation and unwanted thermal injury.
Controlled handpiece motion, consistent sweeping speed, appropriate overlap, and motion-sensitive scanning systems can reduce this risk. Operators should be especially cautious when pausing over irregularities or using a small focused spot.
Understanding the Trade-offs
More passes increase cumulative depth
Additional passes can improve correction of deeper textural abnormalities, but they also increase total ablation and procedural recovery. The clinical benefit must justify the added tissue removal.
The relationship between pass count and depth is affected by fluence, overlap, hydration, spot size, pulse duration, and tissue characteristics. Depth estimates should therefore be confirmed against the specific system’s documentation and clinical evidence.
Higher fluence can reduce pass count
Using higher fluence may achieve a target depth with fewer passes, but it reduces the margin for error and can increase the consequences of overlap or an unintended pause. Lower fluence with controlled passes may provide more opportunities to inspect and adjust the treatment.
Neither approach is universally superior. The appropriate choice depends on the treatment goal, operator experience, anatomical site, and validated device protocol.
Aggressive treatment is not automatically more precise
A more aggressive setting may improve visible correction in selected cases, but it can also increase erythema, delayed healing, pigmentary change, infection risk, and scarring. Precision means controlling the endpoint, not maximizing energy delivery.
Cooling requires context
Cooling and post-procedure comfort measures should follow the treatment type and device protocol. Continuous cooling is more commonly emphasized for non-ablative procedures, while ablative treatments require careful management of tissue temperature, discomfort, and post-treatment inflammation without compromising the intended ablation.
How to Apply This to Your Procedure
The final protocol should be individualized, documented, and verified against the specific Er:YAG system, handpiece, scanner, and indication.
- If your primary focus is superficial epidermal resurfacing: Use controlled 2–3 full-coverage passes within the validated fluence, spot-size, frequency, and overlap ranges, wiping and reassessing between passes.
- If your primary focus is deeper wrinkles or texture: Add uniform passes only after confirming the cumulative depth and tissue endpoint, using approximately 15–30 µm of intended ablation per pass when supported by the system protocol.
- If your primary focus is raised contours or scar shoulders: Switch to a focused 1–2 mm handpiece, use an acute angle, and sculpt progressively to avoid troughs or holes.
- If your primary focus is uniform coverage: Use a systematic grid, change pass direction, maintain consistent overlap, and keep the handpiece moving to prevent pulse stacking.
- If your primary focus is procedural safety: Use wavelength-matched eye protection, plume evacuation, appropriate respiratory protection, and the manufacturer’s validated operating and emergency procedures.
Precise Er:YAG resurfacing comes from controlled cumulative dosing, continuous visualization, and disciplined reassessment at every pass.
Summary Table:
| Technique/Protocol | Key Parameters/Observations |
|---|---|
| Superficial Resurfacing | 3-5 mm spot, 1-2 J, 5-10 Hz, 10-30% overlap, 2-3 passes |
| Epidermal Vaporization | 5-7 J/cm² over 2-4 passes or 8-15 J/cm² over 1-2 passes |
| Dermal Resurfacing | 15-30 µm per pass, adjust based on depth |
| Tissue Sculpting | Focused 1-2 mm handpiece, acute angle, progressive ablation |
| Between Passes | Wipe with dry/moist gauze, reassess tissue plane |
| Safety Control | Use wavelength-appropriate eye protection, plume evacuation, avoid pulse stacking |
Ready to enhance your clinic's aesthetic capabilities with advanced Er:YAG laser systems? At BELIS, we provide professional-grade medical aesthetic equipment exclusively for clinics and premium salons. Our portfolio includes cutting-edge laser systems (Er:YAG, CO2, Alexandrite, Nd:YAG, Pico) and more. Contact us today to explore how our technology can elevate your practice and deliver superior patient outcomes. Get in touch with our experts to discuss your needs!
Related Products
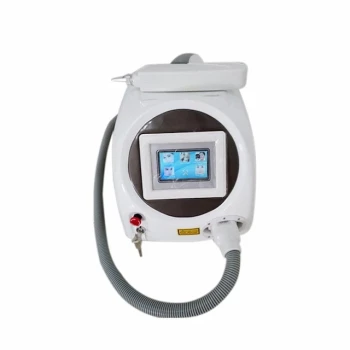
- Q Switch Nd Yag Laser Machine Tattoo Removal Nd Yag Machine
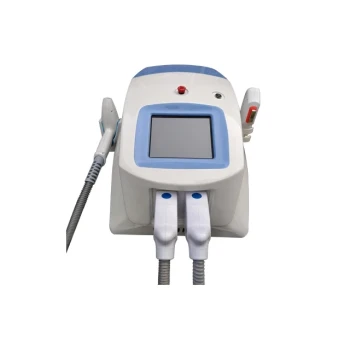
- Clinic Use IPL SHR ND YAG Laser Hair Removal RF Skin Tightening Machine
- Clinic Use IPL and SHR Hair Removal Machine with Nd Yag Laser Tattoo Removal
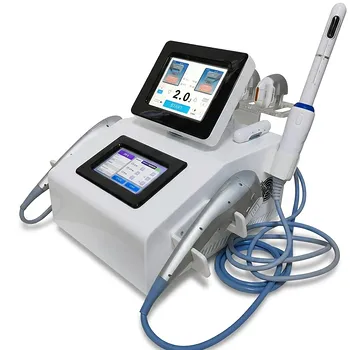
- Professional Face and Vaginal 7D HIFU System for HIFU Clinic Treatments
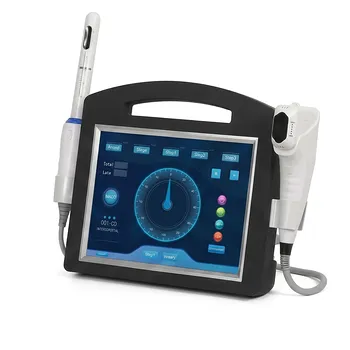
- 4D Vaginal HIFU and Face HIFU System
People Also Ask
- How does laser fluence influence pigment clearance vs. safety? Balancing Speed and Skin Integrity in Tattoo Removal
- What is the documented effectiveness of Q-switched Nd:YAG lasers for tattoo removal? Gold Standard Results
- What pigment compositions and particle properties should practitioners evaluate before operating Q-switched Nd:YAG lasers for tattoo removal? Evaluate pigment composition and particle size for safe, effective tattoo removal.
- How should aesthetic practitioners select wavelengths across Nd:YAG and Q-switched laser systems for target pigment depth and skin phototypes? Key Insights for Clinicians
- How should wavelength and fluence settings be adjusted on Nd:YAG and Q-switched lasers when treating darker skin tones? Optimize Safety & Efficacy