Clinicians should combine fluence-based estimation with direct visual tissue endpoints. For an Er:YAG laser, a practical estimate is approximately 2–5 µm of ablation per J/cm² per pass, with many clinical calculations using a factor near 4–5. The estimate must then be confirmed visually: a pink, evenly resurfaced field indicates epidermal removal to the papillary dermis, while pinpoint bleeding signals entry into superficial papillary dermal vessels and brisk bleeding indicates excessive progression toward the reticular dermis.
Fluence predicts the approximate depth; tissue appearance determines the endpoint. Remove debris between passes, reassess the surface, and stop at the endpoint appropriate for the indication—usually uniform pinkness or carefully controlled pinpoint bleeding, not brisk bleeding.
Estimating Ablation Depth Before Treatment
Use fluence as the starting calculation
Ablation depth can be estimated by multiplying fluence by an approximate ablation factor:
Estimated depth per pass ≈ fluence × 2–5 µm per J/cm²
For example, a fluence of 5 J/cm² may remove approximately 10–25 µm per pass, depending on the device, pulse mode, spot characteristics, tissue hydration, and delivery technique.
Some systems or protocols use a simplified factor of 4 or 5. This is a planning estimate, not a guaranteed tissue measurement.
Confirm the laser’s ablation threshold
Free-running Er:YAG systems generally require fluence above the tissue ablation threshold, reported in the supplementary material as approximately 1.5 J/cm² for a pulse duration near 250 microseconds.
The exact threshold and ablation rate are device- and tissue-dependent. Clinicians should therefore use the manufacturer’s validated specifications and their own standardized test data rather than treating a universal conversion factor as exact.
Distinguish fluence from pulse energy
Fluence is energy per unit area, expressed in J/cm². Pulse energy alone does not determine ablation depth because changing the spot size changes the energy density delivered to the tissue.
A reliable calculation therefore requires the actual fluence at the handpiece, along with the number of passes, overlap, pulse mode, and whether the system automatically modifies delivered energy.
Using Anatomical Endpoints During Ablation
Epidermal endpoint: yellowish-brown tissue debris
Early epidermal ablation may leave a yellowish-brown appearance, often mixed with fine tissue debris.
This appearance indicates that treatment remains within or near the epidermis. The surface should be cleaned before judging the next endpoint, because debris can conceal the underlying tissue plane.
Epidermo-dermal junction: uniform pinkness
After complete epidermal removal, the exposed upper papillary dermis typically appears pink, with small, regular follicular openings that may resemble a fine sponge.
This is an important endpoint when the goal is controlled epidermal removal or superficial resurfacing. The field should appear relatively uniform rather than showing isolated deep pits or irregular bleeding.
Papillary dermis: pinpoint bleeding and transudate
Further ablation into the papillary dermis can expose small capillary vessels, producing pinpoint bleeding and light transudate.
This is a critical clinical signal. In procedures requiring removal of the full epidermis—such as certain recipient-site preparations or superficial lesion treatments—pinpoint bleeding may represent the intended endpoint, provided it is localized and controlled.
Reticular dermis: brisk bleeding and coarse tissue appearance
Progression toward the upper reticular dermis is associated with increased or brisk bleeding, profuse transudate, widened follicular openings, and a coarser collagen pattern.
This is generally a warning to stop. Ablating deeper than the intended papillary endpoint increases the risk of delayed healing, scarring, pigmentary change, and other complications.
Applying Endpoints to Different Clinical Goals
Complete epidermal removal
For procedures requiring homogeneous epidermal removal, clinicians should use multiple controlled passes rather than attempting to reach the target depth in one aggressive pass.
A common endpoint is a uniform pink surface, with pinpoint bleeding indicating that the superficial papillary dermis has been reached. The endpoint must still be interpreted in relation to the treatment indication and anatomical site.
Resurfacing and wrinkle treatment
Resurfacing may require additional passes after the epidermis has been removed. The intended depth should be planned in micrometres, then divided across controlled passes with reassessment after each pass.
Reported protocols may remove approximately 15–30 µm per pass during dermal resurfacing, but settings should not be transferred directly between systems without confirming spot size, pulse duration, fluence, and tissue response.
Lesion sculpting
Raised lesions or tissue peaks require selective treatment rather than uniform deep passes across the entire area.
A smaller spot and an appropriate handpiece angle can help remove elevated tissue while avoiding unintended troughs. Direct visualization is essential because uneven tissue thickness makes a simple depth calculation less reliable.
Small vascular or lipid-containing lesions
For lesions such as xanthelasma, pinpoint bleeding may indicate that the epidermis and superficial lesion components have been removed and that the operator should stop.
Continuing solely to eliminate residual discoloration can convert a controlled superficial treatment into an unnecessarily deep injury. The visual endpoint must be balanced against the risk of scarring.
Improving Accuracy Between Passes
Remove debris before judging depth
Fine ablation debris can obscure color, follicular openings, and bleeding. Wiping the area with dry or damp sterile gauze between passes restores visualization and helps maintain consistent energy delivery.
This step is not cosmetic; it is part of depth control.
Use uniform coverage and controlled overlap
Uneven pass speed, excessive overlap, or repeated treatment of the same spot can create localized deep areas even when the calculated average depth appears appropriate.
Consistent handpiece motion, controlled overlap, and systematic coverage reduce this risk.
Reassess after every pass
The depth estimate is cumulative:
Total estimated depth ≈ ablation per pass × number of passes
However, the visual endpoint takes precedence when tissue response differs from the calculation. Stop or modify treatment when the desired plane is reached, even if the mathematical estimate suggests that another pass remains.
Maintain a treatment record
Record the fluence, spot size, pulse mode, repetition rate, number of passes, overlap, anatomical site, and observed endpoint.
This allows clinicians to compare calculated depth with healing and clinical results, improving future calibration without relying on memory or generalized settings.
When to Stop or Modify the Treatment
Stop at the intended visual endpoint
For superficial epidermal ablation, stop when the field is evenly pink and the epidermis has been removed.
For procedures where papillary dermal exposure is required, limited pinpoint bleeding may be the endpoint. The key distinction is between fine, localized bleeding and progressively heavier bleeding.
Treat brisk bleeding as a warning
Brisk bleeding suggests that ablation has progressed beyond the desired superficial plane toward the reticular dermis.
The appropriate response is usually to stop ablating, control the bleeding, and reassess the tissue rather than attempting to “even out” the area with further passes.
Use coagulation only when clinically appropriate
Er:YAG produces minimal collateral thermal coagulation compared with CO₂ systems. If hemostasis or additional thermal effect is needed, the clinician may use a validated coagulation mode or another appropriate method, but this should be deliberate rather than used to compensate for excessive ablation.
Understanding the Trade-offs
Mathematical estimates are not tissue-depth measurements
The 2–5 µm per J/cm² range is useful for planning, but actual ablation varies with pulse duration, wavelength, spot size, tissue properties, delivery speed, and system calibration.
A calculation can estimate the expected average depth; it cannot identify an isolated area of over-treatment.
Er:YAG endpoints differ from CO₂ endpoints
Er:YAG creates very little thermal coagulation. Therefore, clinicians should not depend on the chamois-yellow or coagulated appearance associated with deeper CO₂ resurfacing.
Er:YAG depth assessment relies more heavily on surface color, follicular morphology, transudate, and vascular bleeding patterns.
Bleeding can be obscured or altered
Anesthetic solutions containing epinephrine may reduce visible bleeding, potentially making the endpoint less obvious. Conversely, aggressive wiping can remove subtle transudate and alter the appearance of the field.
If light oozing obscures assessment, a sponge soaked in lidocaine with epinephrine may be applied briefly according to the clinical protocol, followed by reassessment. Hemostasis should never be used to justify deeper ablation.
Deeper is not automatically more effective
Additional depth may improve correction of some textural abnormalities, but it also increases healing time and the risk of scarring, infection, delayed re-epithelialization, and pigmentary complications.
The correct endpoint is the shallowest plane that achieves the treatment objective.
How to Apply This to Your Project
Use the following framework for treatment planning and intraoperative decision-making:
- If your primary focus is predictable depth: Calculate an initial depth from fluence using approximately 2–5 µm per J/cm², then validate the estimate against the actual device and tissue response.
- If your primary focus is complete epidermal removal: Continue controlled passes until the surface is uniformly pink with fine, regular follicular openings, using limited pinpoint bleeding as confirmation when appropriate.
- If your primary focus is resurfacing: Divide the planned depth across uniform passes, clean debris between passes, and reassess after each pass rather than relying on cumulative arithmetic alone.
- If your primary focus is avoiding scarring: Stop at the intended superficial endpoint and treat increasing or brisk bleeding, profuse transudate, and coarse tissue changes as warnings of excessive depth.
- If your primary focus is consistent outcomes: Standardize fluence, spot size, overlap, pass count, and endpoint documentation for each anatomical site and indication.
The safest Er:YAG technique uses fluence to predict depth, direct visualization to confirm it, and conservative endpoints to prevent unnecessary dermal injury.
Summary Table:
| Method | Description | Clinical Endpoint |
|---|---|---|
| Fluence estimation | 2–5 µm per J/cm² per pass | Calculate initial depth |
| Epidermal ablation | Yellowish-brown debris | Clean surface before judging |
| Epidermo-dermal junction | Uniform pinkness, fine pores | After epidermal removal |
| Papillary dermis | Pinpoint bleeding, transudate | Stop for superficial resurfacing |
| Reticular dermis | Brisk bleeding, coarse collagen | Warning – stop ablating |
Enhance your Er:YAG treatments with BELIS's advanced laser systems, designed for precision and safety. Our professional-grade equipment, including Er:YAG and other aesthetic lasers, empowers clinics and premium salons to achieve superior results. Contact us today to learn how BELIS can elevate your practice.
Related Products
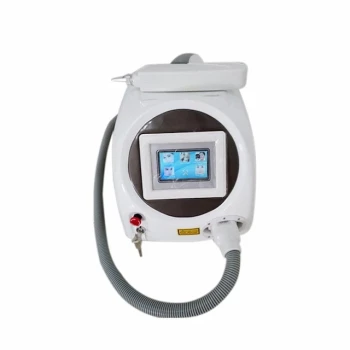
- Q Switch Nd Yag Laser Machine Tattoo Removal Nd Yag Machine
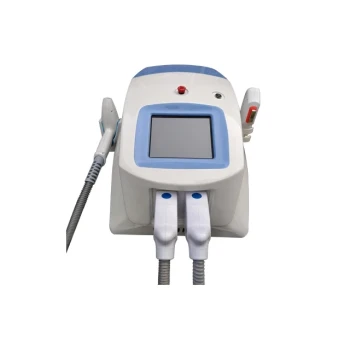
- Clinic Use IPL SHR ND YAG Laser Hair Removal RF Skin Tightening Machine
- Clinic Use IPL and SHR Hair Removal Machine with Nd Yag Laser Tattoo Removal
- Professional Face and Vaginal 7D HIFU System for HIFU Clinic Treatments
- 4D Vaginal HIFU and Face HIFU System
People Also Ask
- How does laser fluence influence pigment clearance vs. safety? Balancing Speed and Skin Integrity in Tattoo Removal
- What is the documented effectiveness of Q-switched Nd:YAG lasers for tattoo removal? Gold Standard Results
- What pigment compositions and particle properties should practitioners evaluate before operating Q-switched Nd:YAG lasers for tattoo removal? Evaluate pigment composition and particle size for safe, effective tattoo removal.
- How should wavelength and fluence settings be adjusted on Nd:YAG and Q-switched lasers when treating darker skin tones? Optimize Safety & Efficacy
- How should aesthetic practitioners select wavelengths across Nd:YAG and Q-switched laser systems for target pigment depth and skin phototypes? Key Insights for Clinicians