Standardization is essential because it makes before-and-after photographs clinically comparable. In aesthetic practices, consistent photography helps practitioners determine whether changes in skin texture, pigmentation, wrinkles, volume, or contour reflect a genuine response to a device or injectable treatment rather than differences in lighting, camera position, exposure, focus, or patient posture. It also supports treatment planning, patient communication, outcome tracking, and defensible medical documentation.
The central principle is simple: every variable that can change the appearance of the patient should remain consistent between consultations. Camera position, lens choice, exposure, lighting, color balance, focus, patient posture, and background must be controlled so that the treatment outcome remains the primary variable being evaluated.
Why Clinical Photography Must Be Standardized
It separates treatment effects from photographic artifacts
A small change in camera height or head position can alter the apparent shape of the face, jawline, eyelids, or neck. Similarly, a change in flash intensity or white balance can make pigmentation, redness, skin texture, or swelling appear better or worse than it truly is.
Standardization reduces these confounding variables. The resulting images are more likely to show actual clinical change rather than changes created by the imaging process.
It improves evaluation of devices and injectables
Energy-based devices such as lasers, intense pulsed light, microneedle radiofrequency, and HIFU often produce gradual or subtle changes. Consistent photographs make it easier to assess improvements in wrinkles, laxity, pigmentation, texture, and recovery over time.
Injectable outcomes also require careful comparison because facial volume and contour can appear different when the patient is photographed from a different angle or with a different expression.
It creates a reliable clinical record
Standardized images support treatment planning, progress monitoring, and documentation of outcomes. They can also provide clearer records when a practice needs to explain what was treated, what changed, and when the change occurred.
Photographs should complement, not replace, written clinical records, consent documentation, and treatment details.
Camera Parameters That Must Be Controlled
Camera-to-patient distance and camera height
The camera should remain at a fixed distance, commonly about 1 to 1.5 meters for full-face photography, depending on the room, lens, and protocol. Close-up images may use a shorter fixed distance, such as approximately 0.8 meters, but the selected distance must be reproducible.
Camera height should be aligned horizontally with the patient’s natural head position. The patient should maintain a neutral posture, with the Frankfort Plane approximately parallel to the floor and the head neither tilted, raised, nor extended.
Lens and focal length
A standard focal length helps minimize facial distortion. A 50 mm lens on a full-frame camera is commonly used for facial photography, while a longer lens, such as approximately 105 mm, may be useful for body or close-up documentation.
Wide-angle lenses can exaggerate central facial features and distort peripheral anatomy. The lens, focal length, and camera format should therefore remain consistent across all comparison images.
Aperture
A relatively small aperture, such as f/11 to f/22, provides greater depth of field and helps keep facial or body contours in focus. This is particularly useful when documenting three-dimensional features.
The exact aperture must be balanced against available light, diffraction, lens performance, and flash power. The important requirement is that the selected setting remains consistent and produces adequate sharpness.
Shutter speed
Shutter speed should be fast enough to prevent motion blur from patient movement or camera shake. A setting faster than 1/60 second, such as 1/125 second, is often appropriate when the lighting and flash system permit it.
The shutter speed must also remain compatible with the camera’s flash synchronization limits. When using a fixed clinical setup, the same shutter speed should be used for both baseline and follow-up images.
ISO
The ISO setting should remain fixed. Changing ISO alters sensor sensitivity, brightness, noise, and sometimes the apparent detail or color of the skin.
A low, consistent ISO is generally preferable when lighting is controlled because it reduces noise and improves image quality. The chosen value should be documented as part of the practice protocol.
Flash output and lighting
Flash position, power, direction, diffusion, and distance should remain unchanged. Ambient room lighting should also be controlled or minimized so that daylight and overhead lighting do not alter the appearance of the skin.
Flash exposure should preserve detail rather than overexpose highlights. Excessive light can wash out pigmentation, redness, and fine texture, while insufficient or inconsistent light can obscure clinically relevant changes.
Exposure and metering
Exposure settings must be consistent between sessions. This includes shutter speed, aperture, ISO, flash compensation, and any exposure compensation applied by the camera.
Automatic exposure can produce different results when skin tone, clothing, background, or treatment-related redness changes. Manual exposure is generally more reproducible in a controlled clinical photography environment.
White balance and color profile
White balance should be fixed rather than left to an automatic setting that may interpret each image differently. Consistent white balance is necessary for comparing skin tone, erythema, pigmentation, bruising, and post-treatment inflammation.
The practice should also use the same camera color profile and image-processing workflow. Uncontrolled editing can introduce additional variation even when the original photographs were consistent.
Focus and image resolution
The focus point, focusing mode, and image resolution should be consistent. Focus should prioritize the relevant treatment area, particularly when documenting fine wrinkles, pores, pigmentation, or localized lesions.
For close-up lesion documentation, a macro lens or macro setting may be appropriate. A measurement scale placed beside a recognizable anatomical landmark can provide an objective reference for lesion size.
Variables Beyond the Camera
Patient position and facial expression
Patients should be photographed in the same standardized views, such as frontal, 45-degree oblique, and profile. They should maintain a neutral facial expression and a forward gaze unless the clinical purpose requires a different expression or movement.
The head, neck, shoulders, and body position should be reproduced at every visit. Small posture changes can falsely suggest differences in skin laxity, tissue volume, or contour.
Background and environment
A clean, non-reflective background prevents visual distractions and helps maintain consistent contrast. A medium blue background is often practical because it provides contrast across a range of skin tones without reflecting as much light as a bright white background.
The background should remain free of wrinkles, strong reflections, and changing objects. Camera framing and the visible amount of background should also be kept consistent.
Patient preparation
Makeup, jewelry, hair placement, and clothing accessories can conceal or emphasize clinical findings. Practices should define whether these items must be removed and apply the same rule at baseline and follow-up visits.
For facial photography, hair should be tied back or covered when appropriate. The preparation protocol should be recorded so that comparisons are made under equivalent conditions.
Understanding the Trade-offs
Manual control improves consistency but requires discipline
Manual camera settings reduce variation, but they require staff to understand and maintain the protocol. A poorly exposed image made with manual settings is not useful merely because it is consistent.
Clinics should create a written setup guide, mark camera and patient positions, and train staff to check focus, framing, exposure, and posture before each session.
A DSLR is capable but not mandatory
A DSLR or other interchangeable-lens camera offers manual control and lens flexibility, which can be valuable for precise clinical documentation. Compact cameras may be less expensive and easier to use, but they can offer less control and may introduce shutter lag or automatic processing differences.
The most important factor is a reproducible workflow. An advanced camera cannot compensate for changing distance, lighting, posture, or exposure between visits.
More detail can expose more inconsistency
High-resolution images can reveal subtle clinical changes, but they also make variations in focus, skin preparation, and lighting more obvious. Practices should define consistent image-processing, storage, and access procedures.
Photographs should not be selectively enhanced in a way that exaggerates improvement or conceals adverse effects. Any necessary adjustments should be applied consistently and documented.
Standardization does not eliminate clinical judgment
Photographs are two-dimensional representations of a three-dimensional patient. They should be interpreted alongside physical examination findings, patient-reported outcomes, treatment parameters, and the timing of the follow-up visit.
A consistent image improves the quality of comparison, but it does not establish treatment efficacy by itself.
How to Apply This to Your Practice
A practical protocol should define the camera, lens, distance, height, views, background, lighting, patient preparation, and file-handling process before the first patient is photographed.
- If your primary focus is objective treatment evaluation: Use fixed camera distance and height, identical lens and focal length, manual exposure, consistent flash output, fixed white balance, and standardized frontal, oblique, and profile views.
- If your primary focus is facial injectables: Use a standard focal length such as 50 mm on a full-frame camera, neutral expression, natural head position, and consistent lighting to reduce apparent changes in volume and contour.
- If your primary focus is energy-based devices: Maintain consistent aperture, shutter speed, ISO, exposure, flash, and color balance so that changes in texture, pigmentation, redness, and wrinkles remain comparable.
- If your primary focus is localized lesions or close-up assessment: Use a fixed macro setup and include a measurement reference beside a stable anatomical landmark.
- If your primary focus is medicolegal documentation: Preserve original files, record the photography settings and treatment date, and use a consistent, traceable image-management process.
A standardized photographic protocol turns clinical images from persuasive snapshots into reliable evidence for evaluating aesthetic treatment outcomes.
Summary Table:
| Parameter | Why It Must Be Controlled | Recommended Setting |
|---|---|---|
| Camera-to-patient distance | Ensures consistent framing and proportions | 1-1.5 m (full-face), 0.8 m (close-up) |
| Camera height | Prevents head tilt and distortion | Aligned with Frankfort Plane |
| Lens focal length | Minimizes facial distortion | 50 mm (full-frame), 105 mm (body/close-up) |
| Aperture | Ensures adequate depth of field | f/11 - f/22 |
| Shutter speed | Prevents motion blur | 1/125 sec or faster |
| ISO | Maintains consistent brightness and noise | Fixed, low value (e.g., 100-200) |
| Flash output/lighting | Preserves skin detail and prevents highlights | Fixed, diffused light |
| Exposure/metering | Avoids auto-exposure shifts | Manual mode |
| White balance/color profile | Accurate skin tone comparison | Fixed, same color profile |
| Focus/resolution | Sharp details for clinical evaluation | Consistent autofocus or manual focus |
| Patient position/expression | Reproducible views | Neutral expression, forward gaze |
| Background/environment | Reduces distractions and inconsistent contrast | Clean, non-reflective medium blue |
| Patient preparation | Prevents concealed findings | Remove makeup, tie back hair, etc. |
Elevate Your Aesthetic Practice with Precision Imaging
Standardized clinical photography is just the first step. At BELIS, we provide professional-grade medical aesthetic equipment designed for clinics and premium salons, ensuring you deliver outstanding results backed by reliable documentation. Explore our advanced laser systems (Diode, Alexandrite, CO2, Erbium, Nd:YAG, Pico), IPL, PDT, HIFU, Microneedle RF, body sculpting solutions, Hydrafacial, and more. Our technology, combined with proper imaging protocols, helps you track treatment success and build lasting patient trust.
Ready to enhance your practice? Contact us today to discover how BELIS can support your clinical excellence and business growth. Let's work together to achieve exceptional outcomes.
Related Products
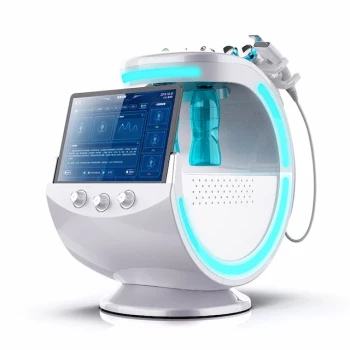
- Hydrofacial Machine with Facial Skin Analyzer and Skin Tester
- Clinic Use IPL SHR ND YAG Laser Hair Removal RF Skin Tightening Machine
- Skin Tester Analysis Machine Analyser for Skin Testing
- Skin Tester Analysis Machine Analyser for Skin Testing
- IPL SHR+Radio frecuency machine
People Also Ask
- What is a HydroFacial treatment? Discover the Secret to Instant, Radiant Skin with Vortex-Fusion Technology
- What is the first step of a hydro-facial treatment? Master the Art of Professional Cleansing & Exfoliation
- What is a Hydrafacial machine and what are its unique features? Elevate Your Clinic with Vortex-Fusion Tech
- Is a HydraFacial machine worth it? Achieve Instant Glow with No Downtime
- What are the business benefits of a spa or salon owning a Hydrafacial machine? Drive Revenue and Loyalty