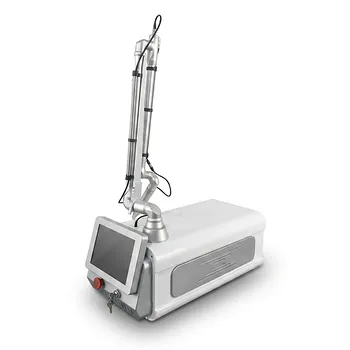
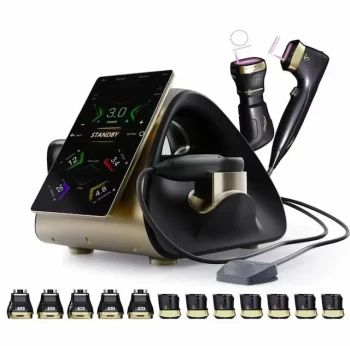
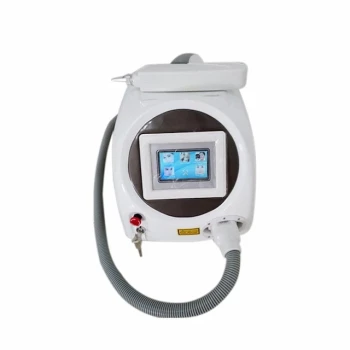
Before clinical treatment, clinic technicians should complete a documented five-step inspection of the laser delivery fiber and handpiece: verify compatibility, inspect for damage or contamination, confirm optical transmission, evaluate the aiming beam, and perform an approved low-power output/alignment test. The system should remain in Standby until the patient, operator, protective eyewear, and treatment settings are fully prepared.
A fiber or handpiece should not be used if it is incompatible, visibly damaged, contaminated, transmitting light unevenly, producing an irregular aiming beam, or failing an approved test exposure. When in doubt, remove it from service and follow the manufacturer’s service procedure.
Why These Checks Matter
Preventing tissue injury
A damaged fiber can scatter, redirect, or concentrate laser energy unpredictably. This can cause unintended tissue injury even when the console displays the correct treatment settings.
Protecting the delivery system
Cracks, contamination, poor connections, and excessive bending can cause energy loss and thermal damage to optical components. They may also lead to inconsistent treatment results or premature equipment failure.
Establishing traceability
Reusable fibers should have documented usage and sterilization histories. Records help technicians identify aging components, confirm processing compliance, and support investigation if output becomes abnormal.
The Five-Step Pre-Operation Inspection
1. Verify fiber and adapter compatibility
Confirm that the fiber’s core diameter and connector type match the laser system’s designated adapter. For systems using sizes such as 260 µm, 400 µm, or 600 µm, the diameter must be verified rather than inferred from appearance.
Do not force an incompatible fiber into an adapter. Record the fiber identification, usage, and sterilization information according to the clinic’s quality system.
2. Inspect the fiber and handpiece visually
Examine the entire fiber length for cracks, kinks, micro-bends, fraying, flattening, discoloration, or other mechanical damage. Inspect the handpiece connection, connector surfaces, optical window, probe, and strain-relief areas.
Look for dust, tissue residue, fluid, or other contamination on optical surfaces. Do not touch optical faces with bare fingers, and do not use a fiber or handpiece if damage cannot be confidently excluded.
3. Confirm optical transmission
Using the manufacturer-approved light-transmission or permeability procedure, check that light passes through the fiber with bright, uniform output at the distal end. Uneven, dim, interrupted, or absent transmission indicates a possible obstruction, connector problem, or internal fiber break.
Clean connectors and optical surfaces only with the materials and method specified by the manufacturer. Although some references identify compressed air, acetone, or high-concentration alcohol, these substances are not universally compatible with coatings, plastics, adhesives, or optical windows.
Use dust-free optical tissue or approved non-woven material, and allow any approved liquid cleaner to evaporate completely. Never use flammable cleaning agents near an energized or recently fired laser, and do not substitute household cleaners.
4. Check the pilot or aiming beam
With the system in the appropriate safe mode, activate the pilot or aiming beam without touching the optical surfaces. Project it onto a suitable nonreflective, manufacturer-approved dark target.
The spot should be circular, regular, well focused, and stable. An elongated, split, irregular, poorly focused, or wandering spot may indicate misalignment, contamination, handpiece damage, or a fiber problem.
Inspect the full fiber length for unexpected lateral light emission. Light escaping from the side of the fiber suggests a partial or complete internal break; the fiber should be removed from service.
5. Perform an approved test exposure and calibration check
After confirming the aiming beam, perform the manufacturer-approved low-power test exposure on an appropriate test target. Avoid improvised combustible targets unless the equipment instructions specifically authorize them, because high-energy lasers can ignite wood, gauze, paper, hair, or residual flammable agents.
Confirm that the active treatment beam is aligned with the pilot beam and that the delivery pattern is appropriate. If output or tissue response appears abnormal, stop and verify the system using the manufacturer’s procedure and, where required, a calibrated external power meter rather than simply increasing the treatment power.
Additional Handpiece and Room Checks
Keep the system in Standby
The laser should remain in Standby while the fiber or handpiece is connected, while treatment parameters are changed, and whenever the operator is moving around the patient or treatment room.
Return the handpiece to its secure dock or holder when it is not being used. Never leave an active handpiece unattended.
Control handpiece orientation
When not actively treating, point the handpiece toward the floor or another manufacturer-approved safe direction. Never look into the distal end of the fiber, probe, or emitter.
If provided, use the handpiece wrist strap or tether to reduce the risk of dropping the device or unintentionally directing energy.
Confirm protective and electrical safeguards
Before firing, verify wavelength-specific protective eyewear for everyone in the room and appropriate patient eye protection for the treatment site. Confirm that interlocks, emergency-stop controls, foot pedals, power cables, and connectors are intact.
Do not bypass interlocks or attempt internal electrical service. High-voltage components may retain hazardous charge even after the system is switched off.
Verify the treatment field
The skin should be clean and free of creams, oils, deodorants, sunscreen, and other residues that can interfere with energy delivery or contaminate the handpiece. Any alcohol-based preparation must be fully evaporated before laser activation.
Keep flammable materials away from the treatment field. Hair near the site should be managed according to the device’s fire-safety procedure.
Understanding the Trade-offs
Do not confuse a bright aiming beam with a safe treatment beam
A visible pilot beam can appear normal while the treatment beam is misaligned, underpowered, or otherwise abnormal. The aiming-beam check is therefore necessary but not sufficient; it must be paired with an approved output or alignment test.
Do not clean aggressively
Scrubbing, scraping, blowing with unfiltered compressed air, or using unapproved solvents can damage optical coatings and introduce particles. Cleaning should be gentle, documented when required, and limited to approved materials.
Do not increase power to compensate for poor output
Insufficient tissue response may result from incorrect parameters, poor coupling, contamination, misalignment, or equipment failure. Raising power before identifying the cause can increase patient injury risk.
Do not rely on visual inspection alone
Some fiber failures are internal and may not be visible externally. Transmission testing, pilot-beam evaluation, and periodic professional calibration are needed to detect problems that a simple visual check cannot identify.
Making the Right Choice for Your Goal
A consistent checklist should be completed before every procedure and whenever a fiber, adapter, or handpiece is changed.
- If your primary focus is patient safety: Do not fire until compatibility, physical integrity, optical transmission, aiming-beam quality, eye protection, and treatment-field safety have all been confirmed.
- If your primary focus is equipment reliability: Maintain fiber usage and sterilization records, use only approved cleaning methods, and remove any component showing abnormal transmission or beam behavior.
- If your primary focus is treatment consistency: Verify aiming-to-treatment-beam alignment and use an approved test target or calibrated power measurement rather than compensating for weak output by increasing power.
- If your primary focus is regulatory and quality compliance: Document the inspection, operator, device, fiber identification, test result, and any corrective action according to the manufacturer’s instructions and clinic policy.
A disciplined pre-operation inspection is the simplest way to prevent an avoidable fiber, handpiece, or laser-output problem from becoming a patient injury.
Summary Table:
| Check Step | Purpose | Key Actions |
|---|---|---|
| 1. Compatibility | Prevent damage and ensure proper energy delivery | Verify fiber core diameter and connector type match the adapter; do not force incompatible parts. |
| 2. Visual Inspection | Identify physical damage or contamination | Examine entire fiber for cracks, kinks, fraying, etc.; inspect connectors and optical surfaces for dust/residue; do not touch optical faces. |
| 3. Optical Transmission | Confirm light passes properly through fiber | Use manufacturer-approved method to check bright, uniform output; clean only with approved materials; avoid flammable cleaners. |
| 4. Aiming Beam Check | Ensure alignment and integrity of delivery system | Project onto nonreflective dark target; spot should be circular, stable, and well-focused; check for lateral light leakage. |
| 5. Test Exposure | Verify final output and calibration | Perform approved low-power test on suitable target; confirm alignment with aiming beam; if abnormal, use calibrated power meter. |
Ensure the safety and efficacy of your laser treatments with BELIS's advanced medical aesthetic devices. Our systems are designed with precision optics and durable fibers to meet the highest clinical standards. Contact our experts today to explore our range of laser and IPL systems, and receive comprehensive training and support. Contact us now to elevate your practice and ensure patient safety.
Related Products
- Clinic Use IPL SHR ND YAG Laser Hair Removal RF Skin Tightening Machine
- Clinic Use IPL and SHR Hair Removal Machine with Nd Yag Laser Tattoo Removal
- Hydrofacial Machine with Facial Skin Analyzer and Skin Tester
- Diode Laser SHR Trilaser Hair Removal Machine for Clinic Use
- Diode Tri Laser Hair Removal Machine for Clinic Use
People Also Ask
- Why is the millisecond pulse width critical for laser hair removal on dark skin? Safety Guide for Dark Skin Treatments
- How does the combined application of laser devices and Eflornithine cream create a synergistic effect? Maximize Results
- What are the core hardware limitations of home hair removal devices? Why Professional Systems Deliver Superior Results
- Why is a 0–10 satisfaction scale used for hair management equipment? Elevate Your Clinic's Clinical Efficacy Metrics
- How long does a single laser hair removal session take? Fast & Effective Treatments for Your Busy Schedule