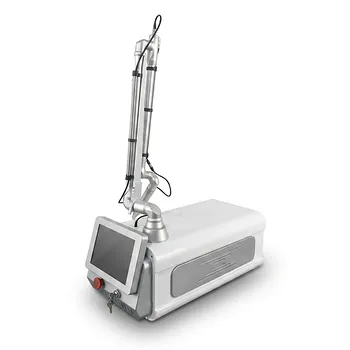
Prepare the fiber with a controlled score-and-cleave technique, then verify the optical pattern before use. Strip the cladding carefully, make a precise microscopic score with a fiber-preparation knife, and break the fiber over a firm support block—preferably silicon—to produce a clean, flat, perpendicular tip. Confirm the result with the visible red aiming beam: a properly prepared tip produces a sharp-edged, circular profile rather than a diffuse or irregular pattern.
The objective is a flat, clean fiber face that delivers energy forward uniformly. Tip preparation alone is not sufficient; inspect the entire fiber, confirm system compatibility and transmission, and keep the flexible sheath or endoscope straight during insertion.
Why Proper Fiber Preparation Matters
A Flat Tip Produces Predictable Delivery
A perpendicular cross-sectional break allows laser photons to radiate forward more homogeneously. An angled, chipped, or contaminated tip can produce uneven output, wider scattering, energy loss, or localized heating.
The Preparation Must Be Controlled
The fiber should be stripped without damaging the underlying optical material. The score should be a precise microscopic nick—not a deep cut—and the fiber should then be broken cleanly across the support block.
Do not grind, twist, or repeatedly bend the fiber to force a break. Those actions can create microscopic defects that may not be immediately visible but can compromise transmission or durability.
How to Prepare the Fiber Tip
1. Confirm the Fiber Before Preparation
Verify that the fiber core diameter is compatible with the laser output adapter and delivery system. Common fiber sizes may include 260 µm, 400 µm, or 600 µm, but the correct size is determined by the specific equipment and manufacturer instructions.
Record the fiber’s usage and sterilization history where applicable. This helps identify cumulative wear and supports traceability.
2. Strip the Protective Layers Carefully
Remove the protective coating and cladding only far enough to prepare the active tip. Use the designated stripping tool and avoid nicking, crushing, or bending the exposed fiber.
The exposed section should remain clean. Contamination on the optical face can absorb energy and contribute to thermal damage.
3. Score the Fiber Once
Use a precision fiber knife to make a small, controlled score around the intended break point. The score initiates the fracture; it should not be used to cut deeply through the fiber.
A poor or repeated score can produce an uneven fracture surface. If the result is chipped, angled, cloudy, or otherwise irregular, do not use the tip for treatment.
4. Break the Fiber Over a Firm Support
Position the scored fiber over a firm support block and apply controlled pressure to break it cleanly. A silicon block is commonly specified for this purpose.
The desired result is a flat, clean, perpendicular cross-section. Handle the newly prepared face carefully and avoid touching it or placing it on a contaminated surface.
How to Inspect the Fiber and Delivery System
Inspect the Entire Fiber
Before connecting the fiber, examine its length for:
- Micro-cracks or fractures
- Severe bending or kinking
- Abrasion or other mechanical damage
- Surface contamination
- Damage near connectors or adapters
Any suspected structural damage warrants removal from service and evaluation according to the equipment’s procedure.
Check Optical Transmission
Couple a standard light source to one end of the fiber and confirm that the distal end produces bright, uniform light. Weak, intermittent, or uneven transmission can indicate contamination, a defective cleave, internal damage, or an incompatible connection.
This check should be performed using an appropriate low-power inspection method—not by activating therapeutic laser energy.
Clean Optical Interfaces Correctly
Clean connectors and adapters without touching their optical faces. Use only cleaning materials and solvents approved for the particular connector and delivery system.
Compressed air, acetone, or high-concentration alcohol may be specified for some optical components, but acetone can damage certain plastics, coatings, and seals. Follow the equipment manufacturer’s cleaning instructions rather than applying a solvent universally, and use dust-free optical tissue where required.
Verify the Red Aiming Beam
Project the visible red pilot or aiming beam onto a flat surface. A properly cleaved and aligned fiber should produce a crisp, sharp-edged circular light pattern.
A diffuse, elongated, irregular, or poorly centered pattern suggests a defective cleave, contamination, misalignment, or damage. Correct the problem before therapeutic use.
Prevent Damage During Insertion
Straighten the Flexible Delivery Path
Insert the fiber while the flexible delivery sheath or endoscope is fully straightened. Straightening reduces friction and prevents the fiber from scoring the internal channel.
This is important because internal channel damage can later contribute to fluid leakage during sterilization and may compromise the delivery system even if the fiber itself appears intact.
Avoid Force and Excessive Bending
The fiber should advance smoothly through the channel. Resistance, binding, or unusual friction should be treated as a warning rather than overcome with additional force.
Respect the minimum bend radius and other limits specified for the fiber and delivery system. The exact limit is equipment-specific and should not be guessed.
Complete a Pre-Treatment Inspection
Confirm Connection and Alignment
Connect the fiber without touching the optical faces. Confirm that the adapter is secure, the fiber is seated correctly, and the aiming beam remains properly aligned after connection.
Test the optical permeability of the assembled delivery system before treatment.
Keep the Laser in Standby
Maintain the laser in Standby mode until the patient, operator, fiber, and delivery path are fully prepared. This reduces the risk of unintended therapeutic emission during inspection or positioning.
Use Trained Personnel and Manufacturer Procedures
Fiber preparation and laser inspection should be performed only by personnel trained for the specific laser and delivery system. Manufacturer instructions take precedence when they specify a different preparation tool, cleaning agent, inspection method, or replacement limit.
Understanding the Trade-offs
A Clean Cleave Is More Important Than Speed
A rapid preparation may save time initially but can create an uneven face that causes poor beam quality, energy loss, or component damage. Repeating a questionable cleave is safer than using an uncertain tip.
Inspection Cannot Repair a Damaged Fiber
A good aiming-beam pattern does not eliminate the need to inspect the fiber’s full length. Internal or mechanical damage may not be fully apparent from the distal light pattern alone.
Solvent Choice Requires Caution
Although certain procedures list acetone or concentrated alcohol for optical cleaning, compatibility varies among plastics, adhesives, coatings, and seals. Use the specified cleaning agent for the exact system and avoid substituting solvents based solely on general optical practice.
Sterilization History Matters
Repeated use and sterilization can affect the fiber and flexible delivery components. A fiber that transmits light adequately may still be unsuitable if it has exceeded its approved use, shows damage, or lacks a verifiable history.
How to Apply This to Your Procedure
Use a documented sequence that combines tip preparation, optical inspection, delivery-path protection, and laser safety controls.
- If your primary focus is beam uniformity: Strip the fiber carefully, score it once with the proper knife, cleave it over a firm support, and accept only a flat perpendicular face that produces a crisp circular aiming-beam profile.
- If your primary focus is preventing equipment damage: Inspect the full fiber, use only compatible cleaning materials, and insert it through a fully straightened sheath or endoscope without force.
- If your primary focus is treatment safety: Confirm fiber compatibility, transmission, connector integrity, aiming-beam alignment, and sterilization history before treatment, while keeping the laser in Standby until everything is ready.
A disciplined cleave-and-inspect process makes fiber-delivered laser energy more predictable while protecting both the delivery system and the patient.
Summary Table:
| Step | Action | Critical Detail |
|---|---|---|
| 1 | Confirm fiber compatibility | Core size (e.g., 260, 400, 600 µm) with adapter |
| 2 | Strip protective layers carefully | Use designated tool; avoid damaging fiber |
| 3 | Score once with fiber knife | Microscopic nick; not deep |
| 4 | Break over firm support (silicon) | Flat, perpendicular cross-section |
| 5 | Inspect entire fiber | Look for cracks, bends, contaminants |
| 6 | Verify red aiming beam | Crisp, circular pattern = good cleave |
| 7 | Clean connectors per manufacturer | Use only approved solvents & methods |
| 8 | Straighten delivery path & insert gently | Avoid force; respect bend radius |
| 9 | Keep laser in standby until ready | Prevent unintended emission |
Elevate Your Laser Safety & Efficiency – At BELIS, we specialize in professional-grade medical aesthetic equipment trusted by clinics and premium salons. Our advanced laser systems (Diode, Alexandrite, CO2, Nd:YAG, Pico) and flexible delivery components are designed for precision and reliability. When you partner with us, you benefit from OEM/ODM support, full certifications, and a dedicated supply chain – ensuring your practice operates at peak performance. Contact our experts today to discuss the perfect laser solution for your clinic and receive exclusive distributor pricing. Get in Touch Now
Related Products
- Hydrofacial Machine with Facial Skin Analyzer and Skin Tester
- Clinic Use IPL SHR ND YAG Laser Hair Removal RF Skin Tightening Machine
- Diode Laser SHR Trilaser Hair Removal Machine for Clinic Use
- Trilaser Diode Hair Removal Machine for Beauty Clinic Use
- 4D Vaginal HIFU and Face HIFU System
People Also Ask
- What is a HydroFacial treatment? Discover the Secret to Instant, Radiant Skin with Vortex-Fusion Technology
- What is the first step of a hydro-facial treatment? Master the Art of Professional Cleansing & Exfoliation
- What are the business benefits of a spa or salon owning a Hydrafacial machine? Drive Revenue and Loyalty
- What is a Hydrafacial machine and what are its unique features? Elevate Your Clinic with Vortex-Fusion Tech
- Is a HydraFacial machine worth it? Achieve Instant Glow with No Downtime