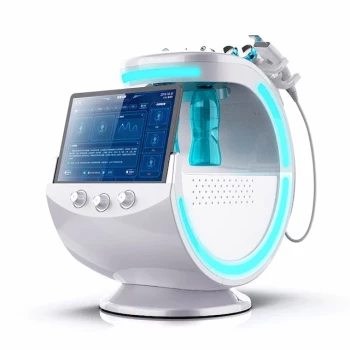
Standardized photography and patient positioning are essential because they make treatment comparisons reliable. Keeping the patient’s head position, camera distance, viewing angles, lighting, and device settings consistent prevents changes in appearance from being mistaken for treatment results. This creates a dependable visual baseline that complements the measurements produced by clinical skin testers and diagnostic imaging systems.
The core principle is simple: if the capture conditions change, the image may change even when the patient’s skin has not. Standardized protocols ensure that differences seen over time are more likely to reflect genuine changes in pigmentation, vascularity, texture, pores, wrinkles, or skin recovery.
Why Consistency Matters in Aesthetic Assessment
It separates real outcomes from image artifacts
Facial appearance is highly sensitive to camera angle, lighting direction, exposure, and head position. A slight rotation can make one side of the face appear more contoured, while different lighting can exaggerate or conceal pigmentation, pores, and wrinkles.
Standardization controls these variables. As a result, practitioners can compare baseline, interim, and post-treatment images with greater confidence.
It creates a reliable clinical baseline
A baseline image records the patient’s condition before treatment under defined conditions. This is essential for evaluating procedures such as energy-based treatments, injectables, pigment therapies, and skin-rejuvenation programs.
Without a consistent baseline, the practitioner may have difficulty determining whether an observed change represents improvement, temporary inflammation, altered lighting, or a different facial expression.
It supports objective patient communication
Patients often remember their skin differently from how it appeared at the initial consultation. Standardized images provide a clear reference for discussing progress, realistic outcomes, and the expected pace of recovery.
They also help prevent subjective judgments based solely on memory or casual photographs taken under inconsistent conditions.
How Positioning Improves Diagnostic Accuracy
The Frankfort Plane establishes a consistent head position
The Frankfort Plane is the line from the tragus of the ear to the infraorbital rim. Keeping this plane parallel to the floor establishes a repeatable natural head position.
This reduces variation caused by tilting the chin upward, lowering it, or rotating the head. It is particularly important when comparing facial symmetry, contours, wrinkles, and treatment areas across multiple sessions.
Fixed distances reduce perspective distortion
The primary reference specifies approximately 1.5 meters for full-face images and 0.8 meters for close-up views. Using fixed distances helps maintain consistent facial proportions and image scale.
If the camera is closer during one visit, perspective can make features appear larger or more prominent. If it is farther away, the face may appear flatter or differently proportioned.
Standardized angles document the entire treatment area
A practical series includes:
- Frontal view
- 45-degree views
- Profile views
These angles provide complementary information about facial symmetry, contour, profile changes, and areas that may not be visible from the front. Repeating the same angles at every visit makes longitudinal comparison more meaningful.
Neutral posture improves repeatability
The patient should maintain a consistent, natural head position and facial expression. Hair should be controlled with a headband, and accessories that obscure the skin should be removed.
Makeup should be cleansed before imaging where appropriate. These steps prevent cosmetic coverage, hair placement, jewelry, or posture from affecting the apparent condition of the skin.
How Photography Complements Skin Testers and Imaging Systems
Imaging devices reveal features that ordinary photographs may miss
Professional diagnostic systems may use polarized, non-polarized, or ultraviolet illumination to visualize features that are difficult to assess with the naked eye. Depending on the system, these may include surface texture, pores, sebum-related features, vascular appearance, and deeper or subsurface pigmentation patterns.
Standardized clinical photographs provide the visible reference, while the device-generated images provide additional structured information.
Consistency improves before-and-after interpretation
A diagnostic device can identify and display changes, but those results still depend on appropriate acquisition conditions and correct interpretation. Consistent patient positioning helps ensure that the same anatomical regions are being compared.
This is especially important when tracking pigmentation clearance, vascular changes, collagen-remodeling effects, wrinkle patterns, or recovery after treatment.
The data can inform treatment planning
Objective baseline information may help practitioners select and adjust appropriate treatment approaches. Depending on the device and clinical context, assessments can support decisions involving skincare, lasers, radiofrequency, or other aesthetic modalities.
However, diagnostic images are an aid to professional assessment. They should not replace medical history, physical examination, contraindication screening, or clinical judgment.
The Standard Operating Procedure Behind Reliable Imaging
Control the capture environment
The practice should define and consistently apply an imaging SOP covering:
- Patient preparation
- Room and lighting conditions
- Camera or device position
- Patient-to-camera distance
- Camera height
- Viewing angles
- Exposure and white balance
- Flash output
- Lens and aperture settings
- Image naming and storage
The exact settings should be appropriate to the camera and device. The important principle is to keep them consistent and document any changes.
Keep the camera aligned with the patient
The camera should be positioned at a consistent height and aligned horizontally with the patient’s natural head position. This minimizes changes in perspective and reduces apparent differences in facial proportions.
The same principle applies when using a diagnostic analyzer: the patient should be positioned according to the manufacturer’s instructions and in the same way at each session.
Document the protocol, not just the image
A useful record should identify the date, treatment stage, view, device or camera used, and any relevant protocol details. This strengthens the clinical record and makes later comparison easier to defend.
Proper documentation also supports continuity when more than one practitioner performs imaging or follow-up consultations.
Understanding the Trade-offs
Standardization requires time and staff discipline
A controlled protocol takes longer than taking an informal photograph. Staff must prepare the patient, position the head correctly, verify distances, and maintain consistent settings.
That additional time is justified when the images are being used to evaluate treatment response or support clinical documentation. A fast but inconsistent process can create more uncertainty than value.
Standardization does not eliminate every source of variation
Skin appearance can still change because of hydration, recent cleansing, sun exposure, inflammation, medication, facial expression, or the normal course of healing. A standardized photograph reduces technical variation; it does not make biological variation disappear.
For this reason, images should be interpreted alongside treatment timing, symptoms, examination findings, and device data.
Imaging devices have technical and interpretive limitations
Different analyzers use different illumination systems, algorithms, thresholds, and measurement methods. Results may not be directly comparable between devices or between software versions.
Practices should use the same validated system where possible, follow manufacturer instructions, and avoid treating a device-generated score as an absolute diagnosis.
Marketing value should not override clinical integrity
Before-and-after images can help patients understand progress, but they should not be selected, edited, or presented in a way that exaggerates results. Consent, privacy protection, secure storage, and appropriate use of clinical images are essential.
The strongest patient communication comes from transparent documentation that shows both expected improvements and realistic limitations.
How to Apply This to Your Practice
A consistent protocol should be simple enough for every trained staff member to follow and specific enough to produce comparable images.
- If your primary focus is treatment evaluation: Use the same patient preparation, Frankfort Plane alignment, camera distance, lighting, settings, and frontal, 45-degree, and profile views at every milestone.
- If your primary focus is diagnostic treatment planning: Combine standardized photographs with the analyzer’s consistent acquisition protocol, then interpret the findings alongside medical history and physical examination.
- If your primary focus is patient education: Use clear, consented baseline and follow-up images to explain genuine changes without implying that every patient will achieve identical results.
- If your primary focus is medical documentation: Maintain an SOP, record the capture conditions, protect patient identity, and preserve images in accordance with applicable privacy and record-keeping requirements.
Standardized imaging turns aesthetic photography from a subjective snapshot into a dependable clinical reference for safer decisions, clearer communication, and more credible outcome assessment.
Summary Table:
| Aspect | Recommended Practice | Benefit |
|---|---|---|
| Head Position | Use Frankfort Plane (tragus to infraorbital rim) parallel to floor | Ensures repeatable, comparable facial views |
| Camera Distance | Full-face: ~1.5m; Close-up: ~0.8m | Reduces perspective distortion |
| Angles | Frontal, 45°, profile views | Documents all treatment areas |
| Patient Prep | No makeup, hair controlled, neutral expression | Prevents cosmetic interference |
| Environment | Consistent lighting, camera settings, flash | Minimizes technical variation |
| Documentation | Record date, stage, view, device settings | Strengthens clinical records |
Ensure your aesthetic practice delivers accurate, credible results with standardized imaging. Discover how BELIS's advanced skin testers and diagnostic systems can enhance your clinic's precision and patient trust. Contact our experts today to elevate your practice! Get in touch with BELIS
Related Products
- Skin Tester Analysis Machine Analyser for Skin Testing
- Skin Tester Analysis Machine Analyser for Skin Testing
- Hydrafacial Machine with Facial Skin Analyzer Skin Tester
- Hydrofacial Machine with Facial Skin Analyzer and Skin Tester
- Clinic Use IPL SHR ND YAG Laser Hair Removal RF Skin Tightening Machine
People Also Ask
- What role do skin testing and analysis devices play in managing patient expectations prior to laser and resurfacing procedures? Learn how objective data improves consultations and outcomes.
- How do skin testing and analysis devices assist in evaluating the effectiveness of fractional laser treatments?
- What role do skin analysis and detection devices play in customized treatment? Enhance Precision and Patient Outcomes
- How does assessing pigment depth with advanced skin analysis devices impact laser parameter selection and patient outcomes in hyperpigmentation treatment? Optimize Laser Therapy Results
- How can diagnostic evaluation frameworks and skin analysis devices be used to guide parameter selection for facial resurfacing procedures? Unlock Personalized Treatment Planning