For layer-by-layer CO₂ laser ablation, use a controlled visual endpoint rather than relying on a fixed number of passes. After appropriate anesthesia and sterile preparation, mark the lesion and a 4 mm margin of clinically normal skin, then ablate in measured passes. After every pass, remove vaporized tissue and char with saline-soaked gauze; inspect the wound bed and continue only where residual target tissue remains. The commonly described endpoint is disappearance of pink residual tissue—often called the Wheeland sign—against the surrounding white dermis, with complete treatment frequently requiring approximately three passes, depending on the lesion and device.
Core takeaway: CO₂ laser ablation should proceed incrementally: protect the patient and staff, use device-specific settings, clear debris after every pass, and determine depth by direct visualization—not by automatically repeating a predetermined number of passes.
Establish the Procedure Before Ablation
Confirm training, indication, and device readiness
CO₂ lasers should be operated only by appropriately trained clinicians within their scope of practice and under the device manufacturer’s instructions for use. Confirm the diagnosis, treatment objective, contraindications, consent, and an appropriate plan for managing bleeding, unexpected depth, airway concerns, or other complications.
The laser, handpiece or scanner, aiming beam, foot switch, plume evacuator, protective eyewear, and emergency equipment should be checked before treatment begins.
Select anesthesia appropriate to the treatment area
Small or localized lesions may be managed with topical anesthesia, local infiltration, or both. Larger resurfacing procedures may require regional blocks, anxiolysis, or anesthesia support, depending on treatment extent and institutional policy.
Local infiltration can also assist with hemostasis. Medication, concentration, maximum dose, allergy status, and use of vasoconstrictors must follow the clinician’s prescribing standards and applicable local protocols.
Prepare and mark the treatment field
Cleanse the area, identify the lesion boundaries, and mark the intended treatment zone. The primary reference specifies including a 4 mm surrounding margin of healthy skin; this margin should still be reconciled with the diagnosis, anatomic location, cosmetic considerations, and the treating clinician’s protocol.
For facial or periocular procedures, use appropriate patient eye protection, including wavelength-specific protective measures and metal ocular shields when indicated. Moist compresses or other preparation steps may be used when required by the procedure and device protocol.
Control the Laser Safely
Protect eyes and manage the beam
CO₂ laser emission at approximately 10,600 nm can cause severe ocular injury. Everyone in the treatment area requires wavelength-appropriate protection with a suitable optical density, and the patient requires protection appropriate to the treatment site.
Use the aiming beam and controlled foot-switch operation correctly. Keep the beam directed only at the intended field, and avoid reflective instruments; matte, non-reflective instruments are preferred where practical.
Control fire and plume hazards
Laser plume can contain vaporized cellular debris, bioaerosols, and particulate matter. Position a high-efficiency smoke evacuator close to the treatment site and use appropriate filtration, such as ULPA- or HEPA-rated systems, according to institutional policy.
Use wet or flame-resistant drapes and keep flammable materials away from the beam path. Fire precautions are particularly important in continuous-wave or high-power modes and when oxygen-enriched environments may be present.
Choose parameters conservatively
Power, pulse duration, spot size, delivery mode, and overlap must be selected for the specific device, tissue, lesion, and clinical objective. Published numerical settings should not be transferred automatically between systems because beam delivery, scanning behavior, and energy calibration differ.
Short, controlled exposures and deliberate spacing help limit unwanted thermal injury. Avoid pulse stacking, excessive dwell time, and unnecessary spot overlap, because accumulated heat can enlarge the zone of residual thermal damage without proportionately improving ablation.
Perform Layer-by-Layer Ablation
Begin with controlled passes
Treat the outlined target area, including the planned margin, using a consistent handpiece or scanner technique. Maintain stable positioning and observe the tissue continuously through appropriate magnification when needed.
Unlike a scalpel, a laser provides little or no tactile feedback. Depth control therefore depends on visual assessment, disciplined hand movements, and familiarity with the system’s beam profile and tissue response.
Clear debris after every pass
After each pass, wipe the field with saline-soaked gauze to remove vaporized cells, char, and other debris. This step exposes the underlying tissue bed and prevents residual material from obscuring the endpoint.
Debris and carbonization can also reduce subsequent energy absorption and contribute to heat accumulation. Mechanical clearing between passes is therefore a core part of the ablation technique, not merely a cosmetic cleanup step.
Assess the clinical endpoint
Inspect the exposed bed after each saline wipe. If pinkish residual tissue remains visible against the surrounding white dermis—the described Wheeland sign—perform another controlled pass over the residual area.
Continue this cycle of pass, saline wipe, inspection, and selective re-treatment until the intended lesion tissue has been removed. Approximately three passes may be required in some procedures to reach the mid-dermis or lower dermis, but the endpoint—not the number three—should determine when to stop.
Preserve surrounding structures
Use the minimum treatment necessary to achieve the intended depth. Avoid extending treatment beyond the planned margin or exposing nearby critical structures to unnecessary heat.
When treating near sensitive anatomy or dense tissue, use the protective hydration, shielding, and beam-control measures specified by the operative protocol. The desired result is complete target removal with minimal collateral thermal injury.
Complete Immediate Wound Care
Inspect the final bed
After the final pass, reassess the entire treatment field under good visualization. Confirm that the intended tissue has been removed and that there is no unrecognized excessive carbonization, untreated focus, or injury to adjacent structures.
Hemostasis, if required, should be achieved using the method appropriate to the site and procedure.
Apply the prescribed dressing or ointment
The supplementary protocol describes applying an antibacterial ointment immediately after ablation. Any ointment, dressing, or wound-care regimen should be selected according to the clinician’s diagnosis, institutional policy, and patient-specific factors.
Provide clear instructions regarding cleansing, moisture balance, infection warning signs, sun protection where relevant, follow-up, and when to seek urgent review.
Understanding the Trade-offs
Visual control replaces tactile feedback
Laser ablation does not provide the resistance or tissue feel of a scalpel. Operators must compensate with visual magnification, stable hand positioning, controlled delivery, and repeated inspection after debris removal.
This learning curve is an operational issue, not a minor ergonomic detail. Staff should become familiar with the handpiece, articulated arm, scanner, and foot-switch behavior before performing complex treatment.
More passes are not automatically better
Additional passes may be necessary when the visual endpoint has not been reached, but unnecessary passes increase thermal exposure and may delay healing or worsen scarring. A fixed “three-pass” rule is therefore unsafe when treated as an automatic prescription.
The correct stopping point is the clinically appropriate endpoint for the lesion and treatment objective, interpreted by a trained operator.
Healing may be slower than with a scalpel
CO₂ laser wounds may re-epithelialize and regain tensile strength somewhat more slowly than traditional scalpel incisions. The supplementary reference indicates that approximately three weeks may be required to achieve comparable tissue strength, although the exact course varies with depth, location, patient factors, and aftercare.
Patients should be counseled about this recovery profile rather than being told that laser treatment is uniformly faster to heal.
Excessive heat causes avoidable injury
Pulse stacking, prolonged dwell time, overlapping spots, and failure to clear char can increase residual thermal damage. The Gaussian distribution of many CO₂ beams means that overlapping spots may create focal heat accumulation even when the nominal settings appear unchanged.
A conservative, non-overlapping pass followed by debris removal is generally safer than repeatedly treating an obscured field.
How to Apply This to Your Protocol
The following checklist should be adapted to the specific laser system, indication, anatomy, and institutional requirements:
- If your primary focus is depth control: Use sequential passes with a saline-gauze wipe and visual inspection after every pass; stop at the appropriate tissue endpoint rather than after a preset number of passes.
- If your primary focus is complete lesion removal: Treat the defined lesion and planned margin, then selectively re-treat visible residual pink tissue while preserving uninvolved structures.
- If your primary focus is patient and staff safety: Require wavelength-specific eye protection, plume evacuation, fire-resistant or wet barriers, non-reflective instruments, and controlled beam activation.
- If your primary focus is minimizing thermal injury: Avoid pulse stacking, prolonged dwell, excessive overlap, and treatment over uncleared char or crystallized debris.
- If your primary focus is recovery: Use an appropriate immediate wound-care regimen and explain that re-epithelialization and tensile-strength recovery may take longer than with a scalpel incision.
A safe CO₂ laser protocol is a disciplined cycle of protect, ablate, wipe, inspect, and stop at the correct endpoint.
Summary Table:
| Key Step | Description |
|---|---|
| Pre-Procedure | Confirm training, indication, device readiness; select anesthesia; prepare and mark treatment field with 4mm margin. |
| Laser Safety | Use wavelength-specific eye protection; control fire and plume hazards; choose conservative parameters. |
| Ablation Process | Perform controlled passes; clear debris with saline gauze after each pass; assess clinical endpoint (Wheeland sign). |
| Wound Care | Inspect final bed; apply antibacterial ointment or dressing; provide aftercare instructions. |
| Key Points | Visual control replaces tactile feedback; more passes are not automatically better; healing may be slower; avoid excessive heat. |
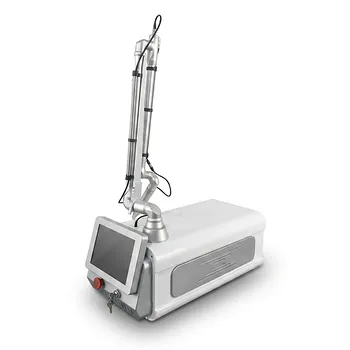
Elevate your standard of care with BELIS's advanced CO2 fractional lasers, designed for precise layer-by-layer ablation with superior safety features. Our devices are trusted by clinics and premium salons worldwide. Contact our experts today to find the perfect system for your practice — Get in touch now and receive personalized guidance and exclusive offers!
Related Products
- Fractional CO2 Laser Machine for Skin Treatment
- Fractional CO2 Laser Machine for Skin Treatment
- Cryolipolysis Fat Freezing Cavitation Lipo Laser Machine
- Cryolipolysis Fat Freezing Machine Cavitation Lipo Laser Machine
- Multifunctional Laser Hair Growth Machine Device for Hair Growth
People Also Ask
- What is the technical principle behind CO2 Laser Fractional micro-perforations? Master Scar Revision Mechanics
- What parameters and treatment intervals are advised when applying fractional CO2 laser technology to delicate periorbital skin laxity? Discover safe protocols for eyelid rejuvenation.
- How do energy-based modalities complement injectable neurotoxins in décolleté rejuvenation? Explore synergistic benefits.
- What is the primary function of a high-precision fractional CO2 laser system for GSM? Restore Vaginal Health Naturally
- Why do fractional CO2 laser parameters need to be differentiated? Master Keloid vs. Hypertrophic Scar Treatment