The standard pre-procedure test fire is a low-power, controlled beam check—not a patient test. Before treating, place a wet wooden target over a wet towel, position the approved handpiece perpendicular to it, and fire at approximately 5 W in single-pulse mode, unless the manufacturer’s instructions specify otherwise. Confirm that the visible aiming beam is present and coincides with a clean, centered, circular burn pattern; then check the required operating modes, return the system to STANDBY, and document the result.
A test fire verifies that the CO₂ laser is operational, aligned, and producing a predictable beam profile. If the aiming beam is absent or the burn is displaced, asymmetric, irregular, or unexpectedly intense, do not use the system on a patient until it has been evaluated by qualified service personnel or the laser safety officer.
What the Test Fire Is Designed to Verify
Operational readiness
The test confirms that the laser emits energy when commanded and that the selected delivery handpiece or attachment is functioning correctly.
It does not replace scheduled preventive maintenance, calibration, or inspection required by the manufacturer.
Infrared and aiming-beam alignment
CO₂ laser energy is invisible infrared radiation. The visible aiming beam provides the operator with an indication of where the treatment beam should strike.
The test burn should be centered on the aiming-beam location. A displaced burn indicates possible misalignment between the aiming beam, delivery optics, and therapeutic beam.
Beam profile and spot integrity
A properly aligned focused beam should produce a clean, reasonably uniform, circular mark appropriate to the selected handpiece and spot size.
An eccentric, elongated, split, uneven, or visibly distorted pattern may indicate optical contamination, damaged delivery components, incorrect focusing, or alignment failure. A clean circular mark is a practical check of the expected fundamental-mode-like profile, but formal beam-mode characterization requires appropriate service instrumentation.
Recommended Daily Test-Firing Protocol
1. Establish a controlled laser area
Restrict access to the room and display the appropriate laser warning signage.
Everyone in the controlled area must use laser eyewear rated for the CO₂ wavelength and the device’s operating conditions. Eyewear must not obstruct the operator’s ability to see the visible aiming beam.
2. Inspect and connect the delivery system
Use the designated handpiece, scanner, articulated arm, or other delivery attachment intended for that laser.
Before firing, inspect the delivery path for obvious damage, contamination, obstruction, or loose connections. Do not improvise with an unapproved target, attachment, or optical component.
3. Prepare a damp test target
Place a wooden tongue depressor or similar suitable wooden target over a wet towel or other damp, nonflammable support.
The target should be stable and positioned perpendicular to the beam path. The damp surface helps limit ignition and provides a visible mark, but it does not eliminate the need for normal fire-safety precautions.
4. Select the initial test setting
Set the laser to approximately 5 W in single-pulse mode, as specified in the reference protocol.
The manufacturer’s instructions for use take precedence. Some systems may require different pulse durations, spot sizes, or test settings, so operators should not assume that one setting is universal for every CO₂ platform.
5. Confirm the aiming beam before firing
Verify that the visible aiming beam is clearly present and appears where expected on the target.
Never fire if the aiming beam is absent. An absent, intermittent, or unexpectedly displaced aiming beam is a stop condition because the operator cannot reliably predict the treatment location.
6. Fire and inspect the mark
Fire the test pulse onto the damp wooden target while maintaining the prescribed working distance and perpendicular handpiece orientation.
Inspect whether the burn:
- Coincides with the visible aiming beam.
- Is centered rather than offset.
- Has a clean, circular profile.
- Is reasonably uniform without a crescent, split, elongated, or irregular pattern.
- Matches the expected spot size and intensity for the selected handpiece and settings.
7. Check applicable operating modes
Repeat the verification for the modes that will be used clinically, such as:
- Continuous wave
- Superpulse
- Repeat-pulse or other pulsed modes
Use manufacturer-approved test parameters for each mode. The 5 W single-pulse setting is a starting check from the stated protocol; it should not automatically be applied unchanged to every operating mode.
8. Return the system to a safe state
Immediately place the unit in STANDBY after testing.
Record the date, device identification, handpiece or attachment, test settings, operator, and whether alignment and beam profile were acceptable. Follow the facility’s laser safety documentation requirements.
How to Interpret the Test Pattern
Acceptable result
An acceptable result is a visible burn that is centered on the aiming beam and has the expected clean, circular, and reasonably uniform appearance for the selected delivery system.
Minor visual differences may occur with different handpieces, focus positions, and pulse modes, so interpretation must be based on the device’s specifications and established facility baseline.
Unacceptable result
Do not treat patients if the aiming beam is missing, the burn does not coincide with it, or the pattern appears distorted or asymmetric.
Other stop conditions include unexpected output, an unusual odor or sound, failure to fire, damaged delivery components, or any result that differs materially from the device’s normal baseline.
Required response
Switch the unit to STANDBY, label or otherwise remove it from clinical use according to facility policy, and notify the responsible laser safety officer or qualified service technician.
Operators should not attempt internal optical alignment or calibration unless specifically authorized and trained to perform that work.
Understanding the Trade-offs
Why a damp wooden target is used
A damp wooden target produces an easily visible thermal mark while reducing the risk associated with firing into a dry combustible surface.
It is a practical operational check, not a precision power-calibration instrument. A passing mark does not prove that the laser meets every output specification.
Why one test setting is not universal
CO₂ platforms differ in pulse structure, focusing optics, handpiece design, scanner configuration, and control software.
Therefore, a 5 W single-pulse test is a useful general protocol from the stated reference, but the device-specific manual and laser safety program must determine the exact settings and acceptance criteria.
Device-specific energy tests
Some systems or clinical protocols use a separate energy-based check, such as a 1 J test produced by 10 W for 100 ms. This is not a universal replacement for the daily 5 W alignment check and should be used only when specified by the manufacturer or validated service protocol.
Mixing test methods without confirming the device requirements can produce misleading results or unnecessary risk.
What the test cannot prove
A burn pattern can reveal gross alignment and beam-profile problems, but it cannot independently certify absolute power accuracy, pulse duration, tissue effect, or long-term calibration.
Those functions require appropriate measurement equipment, documented maintenance, and qualified technical personnel.
Making the Right Choice for Your Goal
Use the test fire as a go/no-go safety check, not as a substitute for engineering calibration.
- If your primary focus is daily clinical safety: Use the damp wooden target, low-power test, aiming-beam confirmation, profile inspection, mode check, STANDBY reset, and documentation sequence before treatment.
- If your primary focus is beam accuracy: Compare the burn directly with the aiming beam and expected spot geometry; stop use immediately if the mark is offset or distorted.
- If your primary focus is regulatory and maintenance compliance: Follow the manufacturer’s instructions, facility laser-safety policy, and scheduled service requirements in addition to the daily test fire.
- If your primary focus is resolving a failed test: Do not recalibrate by trial and error; remove the device from patient use and obtain qualified technical evaluation.
A disciplined pre-procedure test fire turns an invisible-beam hazard into a controlled, documented decision about whether the laser is safe to use.
Summary Table:
| Test Step | Action | Pass Criteria | Stop Condition |
|---|---|---|---|
| 1. Area control | Restrict access, post signage, ensure laser eyewear | Safe environment | - |
| 2. Delivery system | Inspect and connect approved handpiece | No damage, secure connection | Damaged or loose parts |
| 3. Target prep | Place wooden target over wet towel | Stable, perpendicular | - |
| 4. Settings | Set to 5 W single pulse (or per manual) | Correct settings | - |
| 5. Aiming beam | Confirm visible and aligned | Present on target | Absent or displaced |
| 6. Fire and inspect | Fire, check burn mark | Centered, clean, uniform | Offset, irregular, or missing |
| 7. Mode check | Test clinical modes (CW, superpulse, pulsed) | All modes pass | Any failure |
| 8. Safe state | Return to STANDBY, document | Recorded | - |
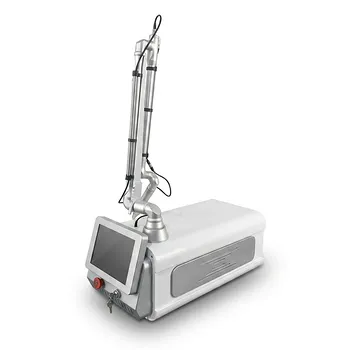
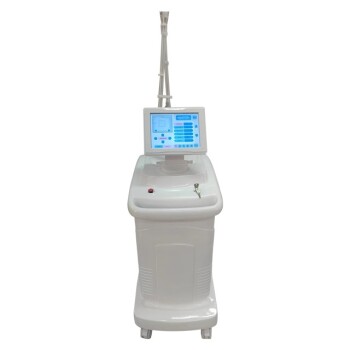
Ensure your clinic's laser safety with BELIS's professional-grade aesthetic equipment. Our advanced CO2 fractional lasers are designed for precise, reliable performance. Contact us today to learn how our systems and support can enhance your practice.
Related Products
People Also Ask
- What is the technical principle behind CO2 Laser Fractional micro-perforations? Master Scar Revision Mechanics
- What parameters and treatment intervals are advised when applying fractional CO2 laser technology to delicate periorbital skin laxity? Discover safe protocols for eyelid rejuvenation.
- How do energy-based modalities complement injectable neurotoxins in décolleté rejuvenation? Explore synergistic benefits.
- What is the primary function of a high-precision fractional CO2 laser system for GSM? Restore Vaginal Health Naturally
- Why do fractional CO2 laser parameters need to be differentiated? Master Keloid vs. Hypertrophic Scar Treatment