For atrophic scars, the recommended ablative-laser technique is selective “shouldering,” not deep ablation of the entire scar. Using an ablative CO₂ or Er:YAG laser, the clinician first performs a light de-epithelialization pass, then makes controlled vaporizing passes along the raised scar margins so they blend with the crater base. Between passes, all partially desiccated tissue and char must be removed with saline-soaked gauze. The scar center should not be aggressively vaporized, because this can deepen the defect.
The objective is to flatten and blend the scar edges, not to remove the crater in its entirety. Conservative, staged treatment with meticulous debris removal reduces the risk of creating a deeper defect and uneven healing.
The Treatment Objective
Match the scar shoulders to the crater base
Atrophic scars often have elevated or sharply defined margins surrounding a depressed center. Ablative treatment should selectively lower these “shoulders” until the transition between normal skin and the scar base is smoother.
This is particularly relevant for boxcar scars and wider ice-pick scars, where sharp borders contribute substantially to the visible shadowing.
Preserve the central structural support
The crater center is already depressed. Ablating it deeply can remove additional tissue and produce a scar that is lower, wider, or more conspicuous after healing.
The key safety rule is therefore: do not ablate an atrophic scar in toto.
Recommended Ablative-Laser Protocol
Begin with light de-epithelialization
The procedure generally starts with a light pass over the treatment area to remove the superficial epidermal layer and define the scar morphology.
This initial pass should be conservative. It is not intended to deeply vaporize the entire scar or create a deep open wound.
Target the raised margins
Subsequent passes are directed primarily at the elevated edges of the scar. Adjustable spot sizes and controlled passes allow the operator to sculpt the margins rather than treating the depression uniformly.
For CO₂ treatment, the supplementary reference describes an example approach of one to two shoulder passes with a scanned beam, using settings such as a 3–4 mm spot, approximately 12 W, and 5.5–6 J/cm². These values are examples—not universal prescriptions—and must be adjusted for the device, scar morphology, skin phototype, treatment area, and operator experience.
Wipe away desiccated tissue between passes
Partially desiccated tissue must be completely removed with saline-soaked gauze between passes.
This step is essential because residual char can absorb energy unpredictably, increasing the risk of excessive thermal injury, uneven ablation, and further scarring.
Feather the treatment borders
The outer edges of the treatment field should be treated more conservatively, using lower fluence or less aggressive settings to create a gradual transition into untreated skin.
Feathering helps reduce visible demarcation lines and improves the cosmetic blending of the resurfaced area.
Safety Technique During Treatment
Use conservative initial energy
Ablative resurfacing should generally begin with conservative fluence and treatment density, especially in patients at increased risk of post-inflammatory hyperpigmentation or hypopigmentation.
Multiple sessions spaced approximately 3–6 months apart may be preferable to a single excessively aggressive treatment.
Assess the tissue after every pass
The operator should continuously evaluate the depth, color, texture, and degree of tissue contraction after each pass.
Further treatment should be limited when the desired margin flattening has been achieved. More energy is not automatically better and can convert a correctable contour problem into a deeper wound.
Avoid confluent deep ablation of the crater
The laser should not be used to vaporize the full depth of the scar depression. The center may receive superficial or fractional treatment where appropriate, but deep central removal risks worsening the atrophy.
Account for skin phototype
Ablative CO₂ resurfacing carries a greater risk of pigmentary complications in darker skin phototypes. Conservative settings, careful patient selection, appropriate pre- and post-treatment management, and consideration of fractional or non-ablative alternatives are important.
Combining Ablative Lasers With Other Procedures
Perform deeper procedures first
If subcision or another deeper scar-release procedure is planned during the same session, it should generally be performed before fractional laser ablation.
The rationale is procedural depth: deeper dermal or hypodermal work should precede more superficial epidermal and dermal resurfacing.
Perform energy treatments before bleeding procedures
Lasers and radiofrequency treatments should generally precede procedures such as microneedling that produce micro-bleeding.
Pooled blood can act as an unwanted chromophore and interfere with uniform optical energy absorption, potentially reducing treatment consistency and increasing the risk of irregular thermal injury.
Select the modality according to the scar
Ablative CO₂ or Er:YAG treatment is most useful when contour irregularity and sharp scar margins are the dominant problems.
Non-ablative systems, including 1064 nm, 1320 nm, 1450 nm, and 1540 nm devices, may be preferable when minimizing downtime and pigmentary risk is more important than achieving rapid, dramatic correction.
Understanding the Trade-offs
Ablative treatment offers stronger resurfacing
Ablative lasers remove or vaporize portions of the epidermis and induce dermal healing and collagen remodeling. They can produce more substantial improvement in scar texture than non-ablative treatment, but they also create more tissue injury and downtime.
Traditional fully ablative Er:YAG or CO₂ treatment may produce an open wound and require a longer recovery period than fractional treatment.
Non-ablative treatment is safer but more gradual
Non-ablative near-infrared systems preserve the epidermis and generally cause only transient erythema and edema. A typical course is three to five sessions spaced about four weeks apart, with remodeling continuing for several months.
Improvement is often approximately 40%–50%, but results are more gradual and usually less dramatic than aggressive ablative resurfacing.
Over-treatment can worsen the scar
The most important technical error is treating the depression as if it were excess tissue. Deeply vaporizing the crater center can increase its depth and create a more obvious structural defect.
Other risks include prolonged erythema, infection, delayed healing, pigmentary changes, textural irregularity, and new or worsened scarring.
How to Apply This to Your Project
The exact settings and candidacy must be determined by a qualified laser clinician after examining the scar type, skin phototype, prior treatments, and risk factors.
- If your primary focus is contour correction: Use conservative ablative CO₂ or Er:YAG “shouldering” to lower raised margins, while preserving the depressed center.
- If your primary focus is safety and minimal downtime: Consider fractional or non-ablative treatment, accepting that improvement is typically slower and less dramatic.
- If your primary focus is combination treatment: Perform deeper procedures such as subcision before laser resurfacing, and complete energy-based treatments before bleeding-inducing mechanical procedures.
- If your primary focus is preventing thermal injury: Use saline-soaked gauze to remove all char between passes and reassess tissue response before applying additional energy.
A safe ablative-laser protocol treats atrophic scars as contour problems requiring precise edge blending, not as defects to be vaporized completely.
Summary Table:
| Aspect | Recommendation |
|---|---|
| Core technique | Selective 'shouldering' – ablate raised margins, not the crater center |
| First pass | Light de-epithelialization to define scar morphology |
| Subsequent passes | Target elevated edges with controlled settings (e.g., 3–4 mm spot, ~12 W, 5.5–6 J/cm²) |
| Between passes | Wipe char with saline-soaked gauze to prevent thermal injury |
| Safety | Use conservative fluence, assess tissue after each pass, avoid deep central ablation |
| Combination | Do deeper procedures (e.g., subcision) before lasers; lasers before bleeding procedures (e.g., microneedling) |
| Skin phototype | Adjust settings and consider alternatives for darker skin to minimize pigmentary risk |
| Alternative | Non-ablative lasers (e.g., 1064 nm, 1540 nm) for minimal downtime, with 3–5 sessions |
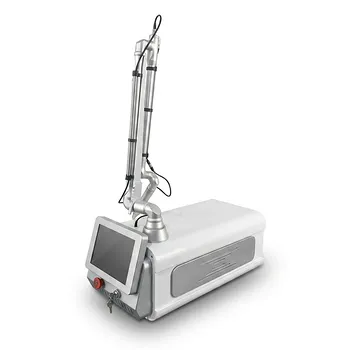
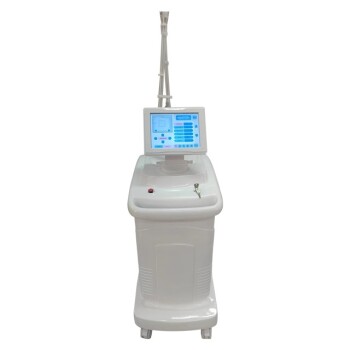
Upgrade your practice with advanced aesthetic technology from BELIS. Our professional-grade lasers, including CO2 and Er:YAG systems, are designed for precise scar treatment like the 'shouldering' technique. Whether you're a clinic or premium salon, our devices offer superior safety, performance, and reliability. Plus, for distributors, we provide OEM/ODM support, certifications, and consistent supply. Contact us today to learn how BELIS can elevate your services and profitability. Reach out now!
Related Products
- Fractional CO2 Laser Machine for Skin Treatment
- Fractional CO2 Laser Machine for Skin Treatment
- Ultrasonic Cavitation Machine Lipo Laser Device
People Also Ask
- What is the technical principle behind CO2 Laser Fractional micro-perforations? Master Scar Revision Mechanics
- What parameters and treatment intervals are advised when applying fractional CO2 laser technology to delicate periorbital skin laxity? Discover safe protocols for eyelid rejuvenation.
- How do energy-based modalities complement injectable neurotoxins in décolleté rejuvenation? Explore synergistic benefits.
- What is the primary function of a high-precision fractional CO2 laser system for GSM? Restore Vaginal Health Naturally
- Why do fractional CO2 laser parameters need to be differentiated? Master Keloid vs. Hypertrophic Scar Treatment